

- iOS 9.9.15.8.7 (beta) (Build 19H6411) for:
- iPad mini 4 (Wi-Fi) (iPad5,1)
- iPad mini 4 (Cellular) (iPad5,2)
- iPad Air 2 (Wi-Fi) (iPad5,3)
- iPad Air 2 (Cellular) (iPad5,4)
- iPhone 6s (iPhone8,1)
- iPhone 6s Plus (iPhone8,2)
- iPhone SE (iPhone8,4)
- iPhone 7 (CDMA/GSM/LTE) (iPhone9,1)
- iPhone 7 Plus (CDMA/GSM/LTE) (iPhone9,2)
- iPhone 7 (GSM/LTE) (iPhone9,3)
- iPhone 7 Plus (GSM/LTE) (iPhone9,4)
- iPod touch 7G (iPod9,1)
- iOS 9.9.16.7.15 (beta) (Build 20H6380) for:
- iPad 5 (Wi-Fi) (iPad6,11)
- iPad 5 (Cellular) (iPad6,12)
- iPad Pro (9.7'', Wi-Fi) (iPad6,3)
- iPad Pro (9.7'', Cellular) (iPad6,4)
- iPad Pro (Wi-Fi) (iPad6,7)
- iPad Pro (Cellular) (iPad6,8)
- iPhone 8 (CDMA/GSM/LTE) (iPhone10,1)
- iPhone 8 Plus (CDMA/GSM/LTE) (iPhone10,2)
- iPhone X (CDMA/GSM/LTE) (iPhone10,3)
- iPhone 8 (GSM/LTE) (iPhone10,4)
- iPhone 8 Plus (GSM/LTE) (iPhone10,5)
- iPhone X (GSM/LTE) (iPhone10,6)
- iOS 9.9.15.8.7 (Build 19H411) for:
- iPad mini 4 (Wi-Fi) (iPad5,1)
- iPad mini 4 (Cellular) (iPad5,2)
- iPad Air 2 (Wi-Fi) (iPad5,3)
- iPad Air 2 (Cellular) (iPad5,4)
- iPhone 6s (iPhone8,1)
- iPhone 6s Plus (iPhone8,2)
- iPhone SE (iPhone8,4)
- iPhone 7 (CDMA/GSM/LTE) (iPhone9,1)
- iPhone 7 Plus (CDMA/GSM/LTE) (iPhone9,2)
- iPhone 7 (GSM/LTE) (iPhone9,3)
- iPhone 7 Plus (GSM/LTE) (iPhone9,4)
- iPod touch 7G (iPod9,1)
- iOS 9.9.16.7.15 (Build 20H380) for:
- iPad 5 (Wi-Fi) (iPad6,11)
- iPad 5 (Cellular) (iPad6,12)
- iPad Pro (9.7'', Wi-Fi) (iPad6,3)
- iPad Pro (9.7'', Cellular) (iPad6,4)
- iPad Pro (Wi-Fi) (iPad6,7)
- iPad Pro (Cellular) (iPad6,8)
- iPhone 8 (CDMA/GSM/LTE) (iPhone10,1)
- iPhone 8 Plus (CDMA/GSM/LTE) (iPhone10,2)
- iPhone X (CDMA/GSM/LTE) (iPhone10,3)
- iPhone 8 (GSM/LTE) (iPhone10,4)
- iPhone 8 Plus (GSM/LTE) (iPhone10,5)
- iPhone X (GSM/LTE) (iPhone10,6)
Posts by ISeeTWizard
-
-
Windows Secure Boot certificates are reaching their "End of Life" starting June 2026. If you haven't updated your UEFI CA certificates, your PC's boot-level security is about to expire.
To check if you already have these new certificates (normally this isn't the case if your machine has more than 2 years) you can use a simply PowerShell command (run as administrator)
PowerShell[System.Text.Encoding]::ASCII.GetString((Get-SecureBootUEFI db).bytes) -match 'Windows UEFI CA 2023'If this returns true your system is up to date but if it returns false you have to update it.
If you get a variable not found or similar you don't have Secure Boot activated in the BIOS which is very bad for Windows 11.
To enforce the update you can do the following, also again in PowerShell as administrator.
PowerShellreg add HKEY_LOCAL_MACHINE\SYSTEM\CurrentControlSet\Control\Secureboot /v AvailableUpdates /t REG_DWORD /d 0x5944 /f Start-ScheduledTask -TaskName "\Microsoft\Windows\PI\Secure-Boot-Update"After that you should reboot.
If you now check with the first command you should get a true.
Now to be sure that the system takes over the new certificates you should reboot a second time and you are ready to go and you are again on a more secure side.
-
- iOS 9.9.26.3.1 (beta) (Build 23D9133) for:
- iPad mini 5 (Wi-Fi) (iPad11,1)
- iPad mini 5 (Cellular) (iPad11,2)
- iPad Air 3 (Wi-Fi) (iPad11,3)
- iPad Air 3 (Cellular) (iPad11,4)
- iPad 8 (Wi-Fi) (iPad11,6)
- iPad 8 (Cellular) (iPad11,7)
- iPad 9 (Wi-Fi) (iPad12,1)
- iPad 9 (Cellular) (iPad12,2)
- iPad Air 4 (Wi-Fi) (iPad13,1)
- iPad Air 4 (Cellular) (iPad13,10)
- iPad Pro 5 (12.9'', Cellular) (iPad13,11)
- iPad Air 5 (Wi-Fi) (iPad13,16)
- iPad Air 4 (Cellular) (iPad13,17)
- iPad 10 (Wi-Fi) (iPad13,18)
- iPad 10 (Cellular) (iPad13,19)
- iPad Air 4 (Cellular) (iPad13,2)
- iPad Pro 3 (11'', Wi-Fi) (iPad13,4)
- iPad Pro 3 (11'', Cellular) (iPad13,5)
- iPad Pro 3 (11'', Wi-Fi) (iPad13,6)
- iPad Pro 3 (11'', Cellular) (iPad13,7)
- iPad Pro 5 (12.9'', Wi-Fi) (iPad13,8)
- iPad Pro 5 (12.9'', Wi-Fi) (iPad13,9)
- iPad mini 6 (Wi-Fi) (iPad14,1)
- iPad mini 6 (Cellular) (iPad14,2)
- iPad Pro 4 (11'', Wi-Fi) (iPad14,3)
- iPad Pro 4 (11'', Cellular) (iPad14,4)
- iPad Pro 6 (12.9'', Wi-Fi) (iPad14,5)
- iPad Pro 6 (12.9'', Cellular) (iPad14,6)
- iPad Pro 3 (11'', Wi-Fi) (iPad8,1)
- iPad Pro 4 (11'', Cellular) (iPad8,10)
- iPad Pro 4 (12.9'', Wi-Fi) (iPad8,11)
- iPad Pro 4 (12.9'', Cellular) (iPad8,12)
- iPad Pro 3 (11'', Wi-Fi, 1 TB) (iPad8,2)
- iPad Pro 3 (11'', Cellular) (iPad8,3)
- iPad Pro 3 (11'', Cellular, 1 TB) (iPad8,4)
- iPad Pro 3 (12.9'', Wi-Fi) (iPad8,5)
- iPad Pro 3 (12.9'', Wi-Fi, 1 TB) (iPad8,6)
- iPad Pro 3 (12.9'', Cellular) (iPad8,7)
- iPad Pro 3 (12.9'', Cellular, 1 TB) (iPad8,8)
- iPad Pro 4 (11'', Wi-Fi) (iPad8,9)
- iPhone 11 (iPhone12,1)
- iPhone 11 Pro (iPhone12,3)
- iPhone 11 Pro Max (iPhone12,5)
- iPhone SE (2020) (iPhone12,8)
- iPhone 12 mini (iPhone13,1)
- iPhone 12 (iPhone13,2)
- iPhone 12 Pro (iPhone13,3)
- iPhone 12 Pro Max (iPhone13,4)
- iPhone 13 Pro (iPhone14,2)
- iPhone 13 Pro Max (iPhone14,3)
- iPhone 13 mini (iPhone14,4)
- iPhone 13 (iPhone14,5)
- iPhone SE (2022) (iPhone14,6)
- iPhone 14 (iPhone14,7)
- iPhone 14 Plus (iPhone14,8)
- iPhone 14 Pro (iPhone15,2)
- iPhone 14 Pro Max (iPhone15,3)
- iOS 9.9.18.7.6 (beta) (Build 22H6320) for:
- iPhone XS (iPhone11,2)
- iPhone XS Max (China) (iPhone11,6)
- iPhone XR (iPhone11,8)
- iOS 9.9.26.3.1 (Build 23D8133) for:
- iPad mini 5 (Wi-Fi) (iPad11,1)
- iPad mini 5 (Cellular) (iPad11,2)
- iPad Air 3 (Wi-Fi) (iPad11,3)
- iPad Air 3 (Cellular) (iPad11,4)
- iPad 8 (Wi-Fi) (iPad11,6)
- iPad 8 (Cellular) (iPad11,7)
- iPad 9 (Wi-Fi) (iPad12,1)
- iPad 9 (Cellular) (iPad12,2)
- iPad Air 4 (Wi-Fi) (iPad13,1)
- iPad Air 4 (Cellular) (iPad13,10)
- iPad Pro 5 (12.9'', Cellular) (iPad13,11)
- iPad Air 5 (Wi-Fi) (iPad13,16)
- iPad Air 4 (Cellular) (iPad13,17)
- iPad 10 (Wi-Fi) (iPad13,18)
- iPad 10 (Cellular) (iPad13,19)
- iPad Air 4 (Cellular) (iPad13,2)
- iPad Pro 3 (11'', Wi-Fi) (iPad13,4)
- iPad Pro 3 (11'', Cellular) (iPad13,5)
- iPad Pro 3 (11'', Wi-Fi) (iPad13,6)
- iPad Pro 3 (11'', Cellular) (iPad13,7)
- iPad Pro 5 (12.9'', Wi-Fi) (iPad13,8)
- iPad Pro 5 (12.9'', Wi-Fi) (iPad13,9)
- iPad mini 6 (Wi-Fi) (iPad14,1)
- iPad mini 6 (Cellular) (iPad14,2)
- iPad Pro 4 (11'', Wi-Fi) (iPad14,3)
- iPad Pro 4 (11'', Cellular) (iPad14,4)
- iPad Pro 6 (12.9'', Wi-Fi) (iPad14,5)
- iPad Pro 6 (12.9'', Cellular) (iPad14,6)
- iPad Pro 3 (11'', Wi-Fi) (iPad8,1)
- iPad Pro 4 (11'', Cellular) (iPad8,10)
- iPad Pro 4 (12.9'', Wi-Fi) (iPad8,11)
- iPad Pro 4 (12.9'', Cellular) (iPad8,12)
- iPad Pro 3 (11'', Wi-Fi, 1 TB) (iPad8,2)
- iPad Pro 3 (11'', Cellular) (iPad8,3)
- iPad Pro 3 (11'', Cellular, 1 TB) (iPad8,4)
- iPad Pro 3 (12.9'', Wi-Fi) (iPad8,5)
- iPad Pro 3 (12.9'', Wi-Fi, 1 TB) (iPad8,6)
- iPad Pro 3 (12.9'', Cellular) (iPad8,7)
- iPad Pro 3 (12.9'', Cellular, 1 TB) (iPad8,8)
- iPad Pro 4 (11'', Wi-Fi) (iPad8,9)
- iPhone 11 (iPhone12,1)
- iPhone 11 Pro (iPhone12,3)
- iPhone 11 Pro Max (iPhone12,5)
- iPhone SE (2020) (iPhone12,8)
- iPhone 12 mini (iPhone13,1)
- iPhone 12 (iPhone13,2)
- iPhone 12 Pro (iPhone13,3)
- iPhone 12 Pro Max (iPhone13,4)
- iPhone 13 Pro (iPhone14,2)
- iPhone 13 Pro Max (iPhone14,3)
- iPhone 13 mini (iPhone14,4)
- iPhone 13 (iPhone14,5)
- iPhone SE (2022) (iPhone14,6)
- iPhone 14 (iPhone14,7)
- iPhone 14 Plus (iPhone14,8)
- iPhone 14 Pro (iPhone15,2)
- iPhone 14 Pro Max (iPhone15,3)
- iOS 9.9.18.7.6 (Build 22H320) for:
- iPhone XS (iPhone11,2)
- iPhone XS Max (China) (iPhone11,6)
- iPhone XR (iPhone11,8)
- iOS 9.9.26.3.1 (beta) (Build 23D9133) for:
-
- iOS 26.3.1 (Build 23D8133) for:
- iPad Pro 3 (11'', Wi-Fi) (iPad8,1) — Download
- iPad Pro 3 (11'', Wi-Fi, 1 TB) (iPad8,2) — Download
- iPad Pro 3 (11'', Cellular) (iPad8,3) — Download
- iPad Pro 3 (11'', Cellular, 1 TB) (iPad8,4) — Download
- iPad Pro 3 (12.9'', Wi-Fi) (iPad8,5) — Download
- iPad Pro 3 (12.9'', Wi-Fi, 1 TB) (iPad8,6) — Download
- iPad Pro 3 (12.9'', Cellular) (iPad8,7) — Download
- iPad Pro 3 (12.9'', Cellular, 1 TB) (iPad8,8) — Download
- iPad Pro 4 (11'', Wi-Fi) (iPad8,9) — Download
- iPad Pro 4 (11'', Cellular) (iPad8,10) — Download
- iPad Pro 4 (12.9'', Wi-Fi) (iPad8,11) — Download
- iPad Pro 4 (12.9'', Cellular) (iPad8,12) — Download
- iPad mini 5 (Wi-Fi) (iPad11,1) — Download
- iPad mini 5 (Cellular) (iPad11,2) — Download
- iPad Air 3 (Wi-Fi) (iPad11,3) — Download
- iPad Air 3 (Cellular) (iPad11,4) — Download
- iPad 8 (Wi-Fi) (iPad11,6) — Download
- iPad 8 (Cellular) (iPad11,7) — Download
- iPad 9 (Wi-Fi) (iPad12,1) — Download
- iPad 9 (Cellular) (iPad12,2) — Download
- iPad Air 4 (Wi-Fi) (iPad13,1) — Download
- iPad Air 4 (Cellular) (iPad13,2) — Download
- iPad Pro 3 (11'', Wi-Fi) (iPad13,4) — Download
- iPad Pro 3 (11'', Cellular) (iPad13,5) — Download
- iPad Pro 3 (11'', Wi-Fi) (iPad13,6) — Download
- iPad Pro 3 (11'', Cellular) (iPad13,7) — Download
- iPad Pro 5 (12.9'', Wi-Fi) (iPad13,8) — Download
- iPad Pro 5 (12.9'', Wi-Fi) (iPad13,9) — Download
- iPad Air 4 (Cellular) (iPad13,10) — Download
- iPad Pro 5 (12.9'', Cellular) (iPad13,11) — Download
- iPad Air 5 (Wi-Fi) (iPad13,16) — Download
- iPad Air 4 (Cellular) (iPad13,17) — Download
- iPad 10 (Wi-Fi) (iPad13,18) — Download
- iPad 10 (Cellular) (iPad13,19) — Download
- iPad mini 6 (Wi-Fi) (iPad14,1) — Download
- iPad mini 6 (Cellular) (iPad14,2) — Download
- iPad Pro 4 (11'', Wi-Fi) (iPad14,3) — Download
- iPad Pro 4 (11'', Cellular) (iPad14,4) — Download
- iPad Pro 6 (12.9'', Wi-Fi) (iPad14,5) — Download
- iPad Pro 6 (12.9'', Cellular) (iPad14,6) — Download
- iPad Air 6 (Wi-Fi) (iPad14,8) — Download
- iPad Air 4 (Cellular) (iPad14,9) — Download
- iPad Air 6 (13'', Wi-Fi) (iPad14,10) — Download
- iPad Air 6 (13'', Cellular) (iPad14,11) — Download
- iPad mini 7 (Wi-Fi) (iPad16,1) — Download
- iPad mini 7 (Cellular) (iPad16,2) — Download
- iPad Pro 5 (11'', Wi-Fi) (iPad16,3) — Download
- iPad Pro 5 (11'', Cellular) (iPad16,4) — Download
- iPad Pro 5 (12.9'', Wi-Fi) (iPad16,5) — Download
- iPad Pro 5 (12.9'', Wi-Fi) (iPad16,6) — Download
- iPhone 11 (iPhone12,1) — Download
- iPhone 11 Pro (iPhone12,3) — Download
- iPhone 11 Pro Max (iPhone12,5) — Download
- iPhone SE (2020) (iPhone12,8) — Download
- iPhone 12 mini (iPhone13,1) — Download
- iPhone 12 (iPhone13,2) — Download
- iPhone 12 Pro (iPhone13,3) — Download
- iPhone 12 Pro Max (iPhone13,4) — Download
- iPhone 13 Pro (iPhone14,2) — Download
- iPhone 13 Pro Max (iPhone14,3) — Download
- iPhone 13 mini (iPhone14,4) — Download
- iPhone 13 (iPhone14,5) — Download
- iPhone SE (2022) (iPhone14,6) — Download
- iPhone 14 (iPhone14,7) — Download
- iPhone 14 Plus (iPhone14,8) — Download
- iPhone 14 Pro (iPhone15,2) — Download
- iPhone 14 Pro Max (iPhone15,3) — Download
- iPhone 15 (iPhone15,4) — Download
- iPhone 15 Plus (iPhone15,5) — Download
- iPhone 15 Pro (iPhone16,1) — Download
- iPhone 15 Pro Max (iPhone16,2) — Download
- iPhone 16 Pro (iPhone17,1) — Download
- iPhone 16 Pro Max (iPhone17,2) — Download
- iPhone 16 (iPhone17,3) — Download
- iPhone 16 Plus (iPhone17,4) — Download
- iPhone 16e (iPhone17,5) — Download
- iPad 11 (Wi-Fi) (iPad15,7) — Download
- iPad 11 (Cellular) (iPad15,8) — Download
- iPad Air 7 (13'', Wi-Fi) (iPad15,5) — Download
- iPad Air 7 (11'', Wi-Fi) (iPad15,3) — Download
- iPad Air 7 (11'', Cellular) (iPad15,4) — Download
- iPad Air 7 (13'', Cellular) (iPad15,6) — Download
- iPhone 17 Pro Max (iPhone18,2) — Download
- iPhone Air (iPhone18,4) — Download
- iPhone 17 Pro (iPhone18,1) — Download
- iPhone 17 (iPhone18,3) — Download
- iPad Pro 8 (11'', Cellular) (iPad17,2) — Download
- iPad Pro 8 (11'', Wi-Fi) (iPad17,1) — Download
- iPad Pro 8 (13'', Wi-Fi) (iPad17,3) — Download
- iPad Pro 8 (13'', Cellular) (iPad17,4) — Download
- iPad16,10 (iPad16,10) — Download
- iPad16,9 (iPad16,9) — Download
- iPad16,8 (iPad16,8) — Download
- iPad16,11 (iPad16,11) — Download
- iPhone18,5 (iPhone18,5) — Download
- iOS 18.7.6 (Build 22H320) for:
- iOS 26.3.1 (Build 23D8133) for:
-
March 4, 2026
PRESS RELEASE
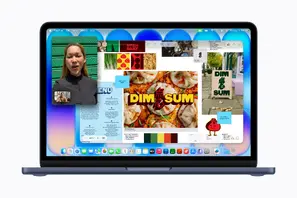
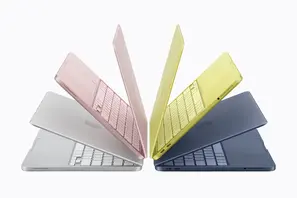
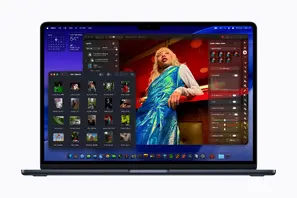
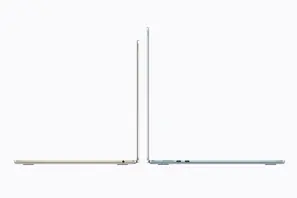
Say hello to MacBook Neo
Apple’s all-new MacBook features a durable aluminum design, a stunning 13-inch Liquid Retina display, the power of Apple silicon, and all-day battery life — all for the breakthrough starting price of just $599
CUPERTINO, CALIFORNIA Apple today unveiled MacBook Neo, an all-new laptop that delivers the magic of the Mac at a breakthrough price, making it even more accessible to millions of people around the world. MacBook Neo starts with a beautiful Apple design, featuring a durable aluminum enclosure in an array of gorgeous colors — blush, indigo, silver, and a fresh new citrus. Its stunning 13-inch Liquid Retina display brings websites, photos, videos, and apps to life with high resolution and brightness, and support for 1 billion colors. Powered by A18 Pro, MacBook Neo can fly through everyday tasks, from browsing the web and streaming content, to editing photos, exploring creative hobbies, or using AI capabilities across apps. In fact, it’s up to 50 percent faster for everyday tasks like web browsing,1 and up to 3x faster when running on-device AI workloads like applying advanced effects to photos,2 compared to the bestselling PC with the latest shipping Intel Core Ultra 5. Providing up to 16 hours of battery life, MacBook Neo allows users to go all day on a single charge.3 A 1080p FaceTime HD camera and dual mics make it easy to look and sound great, and the dual side-firing speakers with Spatial Audio deliver crisp, immersive sound. MacBook Neo also features Apple’s renowned Magic Keyboard for comfortable and precise typing, and a large Multi-Touch trackpad with support for intuitive gestures, enabling smooth and precise control. Completing the MacBook Neo experience is macOS Tahoe, with powerful built-in apps like Messages, Pages, Calendar, and Safari; seamless integration with iPhone; Apple Intelligence; as well as broad compatibility with third-party apps. And starting at just $599 and $499 for education, MacBook Neo is Apple’s most affordable laptop ever, providing an unprecedented combination of quality and value. MacBook Neo is available to pre-order starting today, with availability beginning Wednesday, March 11.
“We’re incredibly excited to introduce MacBook Neo, which delivers the magic of the Mac at a breakthrough price,” said John Ternus, Apple’s senior vice president of Hardware Engineering. “Built from the ground up to be more affordable for even more people, MacBook Neo is a laptop only Apple could create. It features a durable aluminum design in four beautiful colors; a brilliant Liquid Retina display; Apple silicon-powered performance; all-day battery life; a high-quality camera, mics, and speakers; a Magic Keyboard and Multi-Touch trackpad; and the intuitive and powerful features of macOS. There is simply no other laptop like it.”
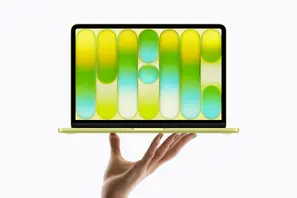
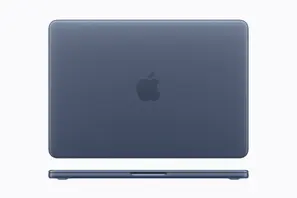
Beautiful and Durable Aluminum Design
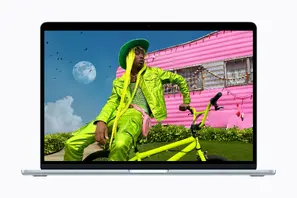
MacBook Neo features a beautifully crafted aluminum design that’s built to last. With its soft, rounded corners, MacBook Neo looks elegant while feeling solid and comfortable to hold. At just 2.7 pounds, it’s also easy to carry in a backpack or handbag. Bringing a fun touch of personality and style to everyday computing, MacBook Neo comes in a spectrum of four gorgeous colors: blush, indigo, silver, and citrus. These colors extend to the Magic Keyboard in lighter shades and new wallpapers, creating a cohesive design aesthetic and making MacBook Neo the most colorful MacBook yet.
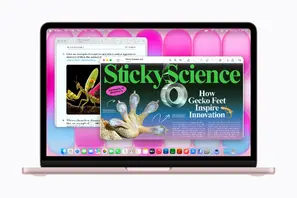
Stunning 13-Inch Liquid Retina Display
A gorgeous 13-inch Liquid Retina display features a 2408-by-1506 resolution, 500 nits of brightness, and support for 1 billion colors, bringing to life sharp, crystal-clear text and vibrant images. The display is both brighter and higher in resolution than most PC laptops in this price range, putting it in a class of its own. Finally, an anti-reflective coating provides a comfortable viewing experience in a variety of lighting conditions, allowing users to watch movies, edit photos, or take video calls from anywhere.
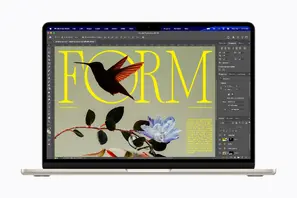
Apple Silicon-Powered Performance
At the heart of MacBook Neo is A18 Pro, enabling users to power through things they do every day, like browsing the web, creating documents, streaming content, editing photos, and taking advantage of AI. Users can seamlessly work between their favorite apps, like Messages, WhatsApp, Canva, Excel, Safari, and more. MacBook Neo with A18 Pro is up to 50 percent faster for everyday tasks than the bestselling PC with the latest shipping Intel Core Ultra 5.1 And for more demanding activities, it’s up to 3x faster for on-device AI workloads2 and up to 2x faster for tasks like photo editing.4 The integrated 5-core GPU brings graphics to life while playing action-packed games or exploring creative hobbies. And a 16-core Neural Engine supports fast on-device Apple Intelligence features and everyday AI tasks like summarizing notes in Bear or using the Clean Up tool in the Photos app, while ensuring user data stays private and secure. MacBook Neo is also fanless, so it runs completely silent.
All-Day Battery Life
Thanks to the incredible power efficiency of Apple silicon, MacBook Neo delivers up to 16 hours of battery life on a single charge.3 This makes it a perfect on-the-go companion for work or play, from the classroom to the coffee shop, and everywhere in between.
Magic Keyboard and New Multi-Touch Trackpad
MacBook Neo features Apple’s much-loved Magic Keyboard, which provides a comfortable, precise typing experience, while a large Multi-Touch trackpad lets users click, scroll, swipe, and pinch anywhere on its surface. The MacBook Neo model with Touch ID enables easy, quick, and secure login authentication, and the ability to conveniently authorize purchases using Apple Pay.
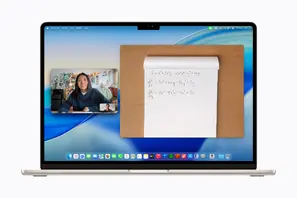
1080p Camera; Dual Speakers and Mics
The 1080p FaceTime HD camera on MacBook Neo has optimized image processing to deliver vibrant video calls. Dual mics with directional beamforming are designed to reduce background noise and isolate a user’s voice, allowing it to come across loud and clear for an excellent video conferencing experience. And dual side-firing speakers with support for Spatial Audio and Dolby Atmos produce immersive sound for watching a movie, listening to music, or using apps like GarageBand.
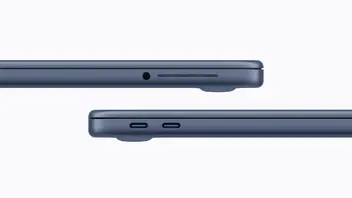
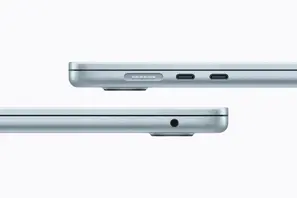
Essential Connectivity
MacBook Neo features two USB-C ports for connecting accessories or an external display.5 Both ports can be used for charging. MacBook Neo also includes a headphone jack for wired audio. Wi-Fi 6E provides fast wireless connectivity, and Bluetooth 6 ensures reliable wireless connections for peripherals and accessories.
Powerful Productivity with macOS
macOS is Apple’s powerful and intuitive operating system for Mac.6 With incredible features and built-in apps like Safari, Photos, Messages, and FaceTime, macOS enables users to get started right out of the box. Apple Intelligence features like Writing Tools, Live Translation, and more are deeply integrated across macOS, elevating the user experience by bringing intelligence to the apps users rely on every day.7 Advanced privacy and security also come standard, featuring industry‑leading encryption, robust virus protections, and automatic free security updates to help keep users protected.
Seamless Integration with iPhone
iPhone users can tap in to Continuity features built in to macOS to make working across iPhone and Mac a breeze. Handoff lets users start a task on MacBook Neo and continue it on iPhone, while Universal Clipboard allows users to copy and paste content between devices. With iPhone Mirroring, users can view and interact with their iPhone directly on MacBook Neo, and users switching to Mac for the first time can use iPhone to conveniently and securely transfer settings, files, photos, passwords, and more.
Built with the Environment in Mind
MacBook Neo was built from the ground up to be Apple’s lowest-carbon MacBook, and brings the company even closer to reaching its ambitious plan to be carbon neutral across its entire footprint by 2030. It features 60 percent recycled content — the highest percentage of any Apple product.8 This includes 90 percent recycled aluminum overall and 100 percent recycled cobalt in the battery. The enclosure is manufactured with a material-efficient forming process that uses 50 percent less aluminum compared to traditional machining methods. MacBook Neo is manufactured with 45 percent renewable electricity, like wind and solar, across the supply chain. It also meets Apple’s high standards for energy efficiency and safe chemistry. Additionally, the paper packaging is 100 percent fiber-based and can be easily recycled.9
Pricing and Availability
- Customers can pre-order the new MacBook Neo starting today at apple.com/store and in the Apple Store app in 30 countries and regions, including the U.S. It will begin arriving to customers, and will be in Apple Store locations and Apple Authorized Resellers, starting Wednesday, March 11.
- MacBook Neo starts at $599 (U.S.) and $499 (U.S.) for education. It is available in four colors — blush, indigo, silver, and citrus. Additional technical specifications, configure-to-order options, and accessories are available at apple.com/mac.
- With Apple Trade In, customers can trade in their current computer and get credit toward a new Mac. Customers can visit apple.com/shop/trade-in to see what their device is worth.
- AppleCare delivers exceptional service and support, with flexible options for Apple users. Customers can choose AppleCare+ to cover their new Mac, or in the U.S., AppleCare One to protect multiple products in one simple plan. Both plans include coverage for accidents like drops and spills, theft and loss protection on eligible products, battery replacement service, and 24/7 support from Apple Experts. For more information, visit apple.com/applecare.
- Every customer who buys directly from Apple Retail gets access to Personal Setup. In these guided online sessions, a Specialist can walk them through setup, or focus on features that help them make the most of their new device. Customers can also learn more about getting started and going further with their new device with a Today at Apple session at their nearest Apple Store.
- Customers in the U.S. who shop at Apple using Apple Card can pay monthly at 0 percent APR when they choose to check out with Apple Card Monthly Installments, and they’ll get 3 percent Daily Cash back — all up front. More information — including details on eligibility, exclusions, and Apple Card terms — is available at apple.com/apple-card/monthly-installments.
About Apple Apple revolutionized personal technology with the introduction of the Macintosh in 1984. Today, Apple leads the world in innovation with iPhone, iPad, Mac, AirPods, Apple Watch, and Apple Vision Pro. Apple’s six software platforms — iOS, iPadOS, macOS, watchOS, visionOS, and tvOS — provide seamless experiences across all Apple devices and empower people with breakthrough services including the App Store, Apple Music, Apple Pay, iCloud, and Apple TV. Apple’s more than 150,000 employees are dedicated to making the best products on earth and to leaving the world better than we found it.
- Testing was conducted by Apple in January and February 2026 using preproduction MacBook Neo systems with Apple A18 Pro, 6-core CPU, 5-core GPU, 8GB of unified memory, and 256GB SSD, as well as production Intel Core Ultra 5-based PC systems with Intel Graphics, 8GB of RAM, 256GB SSD, and the latest version of Windows 11 Home available at the time of testing. Bestselling PC laptop with the latest shipping Intel Core Ultra 5 processor is based on publicly available sales data over the prior six months. Speedometer 3.1 performance benchmark tested with pre-release Safari 26.3 on macOS Tahoe, and both Chrome 144.0.7559.110 and Edge 144.0.3719.104 on Windows 11 Home. Performance tests are conducted using specific computer systems and reflect the approximate performance of MacBook Neo.
- Testing was conducted by Apple in January and February 2026 using preproduction MacBook Neo systems with Apple A18 Pro, 6-core CPU, 5-core GPU, 8GB of unified memory, and 256GB SSD, as well as production Intel Core Ultra 5-based PC systems with Intel Graphics, 8GB of RAM, 256GB SSD, and the latest version of Windows 11 Home available at the time of testing. Bestselling PC laptop with the latest shipping Intel Core Ultra 5 processor is based on publicly available sales data over the prior six months. Adobe Photoshop 2026 27.3.0 tested using the following filters and functions: super zoom, depth blur, JPEG artifact removal, style transfer, photo restoration, and landscape mixer. Performance tests are conducted using specific computer systems and reflect the approximate performance of MacBook Neo.
- Testing was conducted by Apple in January 2026 using preproduction MacBook Neo systems with Apple A18 Pro, 6-core CPU, 5-core GPU, 8GB of unified memory, and 256GB SSD. Wireless web battery life tested by browsing 25 popular websites while connected to Wi-Fi. Video streaming battery life tested with 1080p content in Safari while connected to Wi-Fi. All systems tested with display brightness set to eight clicks from bottom. Battery life varies by use and configuration. See apple.com/batteries for more information.
- Testing was conducted by Apple in January and February 2026 using preproduction MacBook Neo systems with Apple A18 Pro, 6-core CPU, 5-core GPU, 8GB of unified memory, and 256GB SSD, as well as production Intel Core Ultra 5-based PC systems with Intel Graphics, 8GB of RAM, 256GB SSD, and the latest version of Windows 11 Home available at the time of testing. Bestselling PC laptop with the latest shipping Intel Core Ultra 5 processor is based on publicly available sales data over the prior six months. Tested with Affinity v3.0.3.4027 using the built-in benchmark 30000. Performance tests are conducted using specific computer systems and reflect the approximate performance of MacBook Neo.
- MacBook Neo features two USB-C ports — USB 3 (left) and USB 2 (right). External display connectivity supported on left USB 3 port only.
- macOS Tahoe is available as a free software update. Some features may not be available in all regions or in all languages. See requirements at apple.com/os/macos.
- Apple Intelligence is available in beta with support for these languages: English, Danish, Dutch, French, German, Italian, Norwegian, Portuguese, Spanish, Swedish, Turkish, Vietnamese, Chinese (simplified), Chinese (traditional), Japanese, and Korean. Some features may not be available in all regions or languages. For feature and language availability and system requirements, see support.apple.com/en-us/121115.
- Product recycled or renewable content is the mass of certified recycled material relative to the overall mass of the device, not including packaging or in-box accessories. Comparison excludes accessories.
- Breakdown of U.S. retail packaging by weight. Adhesives, inks, and coatings are excluded from calculations.
Media


Press Contacts
Starlayne Meza - Apple
starlayne_meza@apple.comApple Media Helpline
media.help@apple.com -
March 3, 2026
PRESS RELEASE
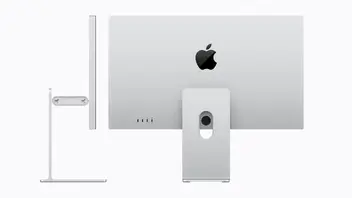
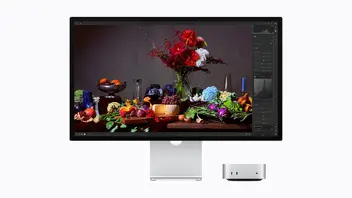
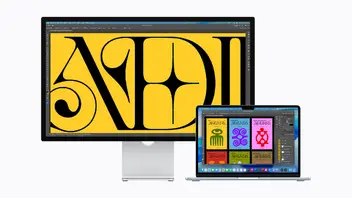
Apple unveils new Studio Display and all-new Studio Display XDR
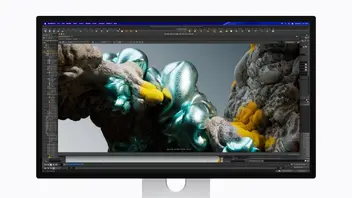
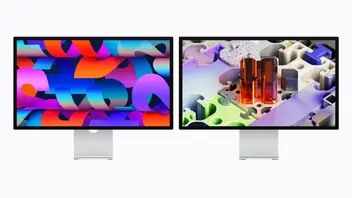
Studio Display XDR is the world’s best pro display, featuring a 27-inch 5K Retina XDR display with a mini-LED backlight, 2000 nits of peak HDR brightness, and a 120Hz refresh rate
CUPERTINO, CALIFORNIA Apple today announced a new family of displays engineered to pair beautifully with Mac and meet the needs of everyone, from everyday users to the world’s top pros. The new Studio Display features a 12MP Center Stage camera, now with improved image quality and support for Desk View; a studio-quality three-microphone array; and an immersive six-speaker sound system with Spatial Audio. It also now includes powerful Thunderbolt 5 connectivity, providing more downstream connectivity for high-speed accessories or daisy-chaining displays. The all-new Studio Display XDR takes the pro display experience to the next level. Its 27-inch 5K Retina XDR display features an advanced mini-LED backlight with over 2,000 local dimming zones, up to 1000 nits of SDR brightness, and 2000 nits of peak HDR brightness, in addition to a wider color gamut, so content jumps off the screen with breathtaking contrast, vibrancy, and accuracy. With its 120Hz refresh rate, Studio Display XDR is even more responsive to content in motion, and Adaptive Sync dynamically adjusts frame rates for content like video playback or graphically intense games. Studio Display XDR offers the same advanced camera and audio system as Studio Display, as well as Thunderbolt 5 connectivity to simplify pro workflow setups. The new Studio Display with a tilt-adjustable stand starts at $1,599, and Studio Display XDR with a tilt- and height-adjustable stand starts at $3,299. Both are available in standard or nano-texture glass options, and can be pre-ordered starting tomorrow, March 4, with availability beginning Wednesday, March 11.
“Apple has led the industry in delivering the world’s most advanced displays for pros to do their life’s best work, and today we do that once again with the introduction of the new Studio Display family,” said John Ternus, Apple’s senior vice president of Hardware Engineering. “Studio Display gets even better with a new 12MP Center Stage camera and powerful Thunderbolt 5 connectivity. And the Studio Display XDR is a huge leap forward for XDR technology, with a mini-LED backlight, 2000 nits of peak HDR brightness, advanced color accuracy, and a 120Hz refresh rate, transforming workflows like filmmaking, design and print, and 3D animation. It’s by far the world’s best pro display.”
Studio Display — the Perfect Companion to Mac
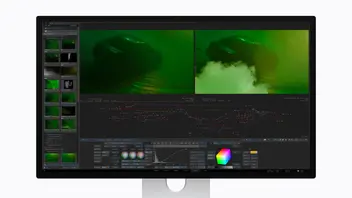
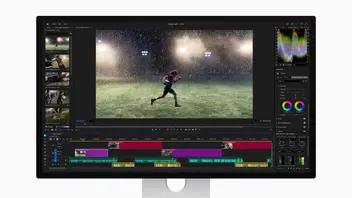
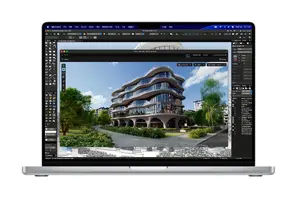
The new Studio Display pairs excellent visual quality with compelling features that deliver a great experience when connected to a Mac across a range of professional workflows — from photo and video editing to coding, music production, and everyday tasks. The stunning 27-inch 5K Retina display boasts over 14 million pixels, 600 nits of brightness, and P3 wide color for rich, true-to-life imagery. Studio Display includes a 12MP Center Stage camera, now with Desk View; a studio-quality three-microphone array; and an incredible six-speaker sound system with four force-cancelling woofers that deliver 30 percent deeper bass than the previous generation, plus two high-performance tweeters for immersive audio. Studio Display also brings Thunderbolt 5 connectivity with two ports, so users can daisy-chain up to four Studio Display models for a combined nearly 60 million pixels, or connect high-speed accessories.1 In addition, two USB-C ports can be used for peripherals and charging. With the included Thunderbolt 5 Pro cable, users get a convenient all-in-one connection that offers up to 96W of charging power — enough to fast-charge a 14-inch MacBook Pro.2 Studio Display is available with standard glass or optional nano-texture glass for challenging lighting conditions. It comes with a tilt-adjustable stand, or can be configured with a tilt- and height-adjustable stand or a VESA mount adapter for custom desk setups.
Studio Display XDR — the World’s Best Pro Display
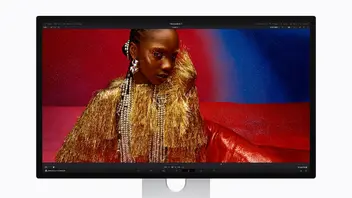
The all-new Studio Display XDR delivers the most advanced display technology and a robust set of features for pro users who need the ultimate front-of-screen performance. With 2000 nits of peak HDR brightness, a 1,000,000:1 contrast ratio, P3 and Adobe RGB wide color gamuts, a 120Hz refresh rate, Adaptive Sync, new DICOM medical imaging presets, a powerful combination of camera and audio, and Thunderbolt 5 connectivity, Studio Display XDR is designed for workflows like HDR video editing, 3D rendering, and diagnostic radiology.2
Advanced XDR Display Technology
Studio Display XDR features a stunning 27-inch 5K Retina XDR display with 5120-by-2880 resolution, offering exceptional detail and clarity. The mini-LED backlight utilizes 2,304 local dimming zones that enable extreme contrast. Studio Display XDR also delivers up to an outstanding 1000 nits of SDR brightness, 2000 nits of peak HDR brightness, and a 1,000,000:1 contrast ratio. This wide dynamic range — from the brightest brights to the deepest blacks — makes HDR content pop off the screen while virtually eliminating distracting halo and blooming effects.
Enhanced Color Accuracy
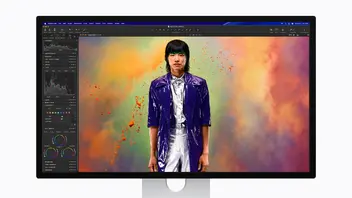
Ideal for print and design professionals, Studio Display XDR adds Adobe RGB color gamut support, in addition to P3 wide color, making it an even better reference display. This results in more than 80 percent Rec. 2020 coverage for HDR video editing and color grading. Both P3 and Adobe RGB are accessible from the same default preset, streamlining pro workflows that frequently switch between color spaces.
Smooth 120Hz Refresh Rate and Adaptive Sync
Studio Display XDR features a 120Hz refresh rate, enabling smooth, ultra-responsive motion. Adaptive Sync supports a continuously variable refresh rate between 47Hz to 120Hz, making gaming more fluid with faster frame delivery and lower display latency.
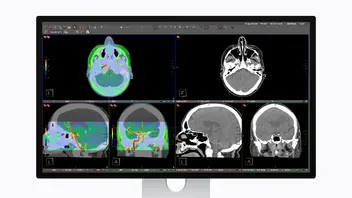
Innovative DICOM Medical Imaging
Today, Apple introduces new DICOM medical imaging presets and the Medical Imaging Calibrator to enable use in diagnostic radiology, allowing radiologists to view diagnostic images directly on Studio Display XDR.2 Many medical professionals already use Mac for their office or home setups, and Studio Display XDR offers a versatile alternative to single-purpose medical imaging displays, with seamless display mode switching. The Medical Imaging Calibrator on macOS is pending FDA clearance and is expected to be available soon in the U.S. For decades, healthcare professionals and developers have taken advantage of Apple’s innovative products and frameworks to help achieve better patient outcomes, broaden research opportunities, and improve efficiency across healthcare systems. Apple continues to innovate and collaborate with the healthcare community on solutions to ultimately improve care for their patients.
Powerful Combination of Camera, Audio, and Thunderbolt 5 Connectivity
Studio Display XDR features a 12MP Center Stage camera that keeps users centered in the frame as they move. Video calls become more engaging with Desk View, which simultaneously displays the user and a top-down view of their desk — great for demonstrating a creative project. It also includes a studio-quality three-microphone array with directional beamforming and an immersive six-speaker sound system with support for Spatial Audio.
Studio Display XDR also features Thunderbolt 5 connectivity, with a second port for connecting downstream high-speed accessories or daisy-chaining other displays. And with two additional USB-C ports for even more connectivity, it can act as a Thunderbolt hub, keeping a workspace free of clutter while offering up to 140W of charging power through the included Thunderbolt 5 Pro cable — enough to fast-charge a 16-inch MacBook Pro.3
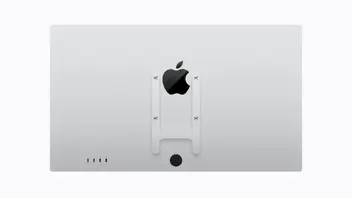
Versatile Stand and Accessories
Studio Display XDR includes a tilt- and height-adjustable stand to meet the needs of a variety of workspaces. With a height range of 105mm, the stand features a sophisticated counterbalancing arm that makes the display feel weightless, and as users adjust it, the display stays precisely in place. An optional VESA mount adapter is available for those who prefer to use VESA-compatible stands, mounts, and arms for a customized desk setup.
Studio Display Family and the Environment
Studio Display and Studio Display XDR were built with the environment in mind, and bring Apple even closer to reaching its ambitious plan to be carbon neutral across its entire footprint by 2030. Both are made with recycled content, including 100 percent recycled aluminum in the stand and 80 percent recycled glass in the standard glass option. Studio Display and Studio Display XDR are designed to be durable, repairable, and also offer industry-leading software support, while meeting Apple’s high standards for energy efficiency and safe chemistry. The paper packaging is 100 percent fiber-based and was designed to collapse so it can be easily recycled.4
Pricing and Availability
- Customers can pre-order the new Studio Display and Studio Display XDR starting tomorrow, March 4, at apple.com/store and in the Apple Store app in 35 countries and regions, including the U.S. They will begin arriving to customers, and will be in select Apple Store locations and Apple Authorized Resellers, starting Wednesday, March 11.
- Studio Display starts at $1,599 (U.S.) and $1,499 (U.S.) for education. Studio Display XDR replaces Pro Display XDR and starts at $3,299 (U.S.) and $3,199 (U.S.) for education.
- Additional technical specifications, including nano-texture glass and a choice of stand options, are available at apple.com/store.
- Magic Keyboard with Touch ID and Numeric Keypad ($199 U.S.), Magic Trackpad ($149 U.S.), and Magic Mouse (starting at $79 U.S.) in black or white color options are available at apple.com/store.
- AppleCare delivers exceptional service and support, with flexible options for Apple users. Customers can choose AppleCare+ to cover their new Mac, or in the U.S., AppleCare One to protect multiple products in one simple plan. Both plans include coverage for accidents like drops and spills, theft and loss protection on eligible products, battery replacement service, and 24/7 support from Apple Experts. For more information, visit apple.com/applecare.
- Customers in the U.S. who shop at Apple using Apple Card can pay monthly at 0 percent APR when they choose to check out with Apple Card Monthly Installments, and they’ll get 3 percent Daily Cash back — all up front. More information — including details on eligibility, exclusions, and Apple Card terms — is available at apple.com/apple-card/monthly-installments.
About Apple Apple revolutionized personal technology with the introduction of the Macintosh in 1984. Today, Apple leads the world in innovation with iPhone, iPad, Mac, AirPods, Apple Watch, and Apple Vision Pro. Apple’s six software platforms — iOS, iPadOS, macOS, watchOS, visionOS, and tvOS — provide seamless experiences across all Apple devices and empower people with breakthrough services including the App Store, Apple Music, Apple Pay, iCloud, and Apple TV. Apple’s more than 150,000 employees are dedicated to making the best products on earth and to leaving the world better than we found it.
- Users can daisy-chain up to four Studio Display models with a MacBook Pro with M5 Max.
- The Medical Imaging Calibrator is pending FDA review and is expected to be available soon. The medical imaging presets should not be used for diagnostic purposes unless the display has been calibrated using the Medical Imaging Calibrator on macOS and paired with a compatible DICOM viewer. The presets are available on Studio Display XDR and are intended for use by medical professionals. Not intended for use in mammography.
- Charge time varies with settings and environmental factors; actual results will vary.
- Breakdown of U.S. retail packaging by weight. Adhesives, inks, and coatings are excluded from calculations.
Media


Press Contacts
Lizette Viviana Du Pond - Apple
ldupond@apple.comStarlayne Meza - Apple
starlayne_meza@apple.comApple Media Helpline
media.help@apple.com -

March 3, 2026
PRESS RELEASE
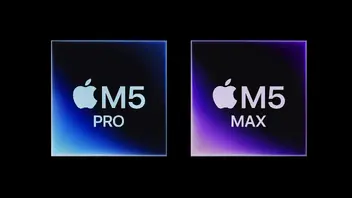
Apple debuts M5 Pro and M5 Max to supercharge the most demanding pro workflows
Built using the new Apple-designed Fusion Architecture, M5 Pro and M5 Max feature an advanced CPU, a next‑generation GPU with Neural Accelerators, and higher unified memory bandwidth for a massive increase in AI compute
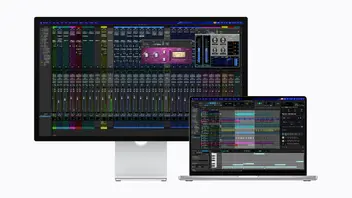
CUPERTINO, CALIFORNIA Apple today announced M5 Pro and M5 Max, the world’s most advanced chips for pro laptops, powering the new MacBook Pro. The chips are built using a new Apple-designed Fusion Architecture. This innovative design combines two dies into a single system on a chip (SoC), which includes a powerful CPU, scalable GPU, Media Engine, unified memory controller, Neural Engine, and Thunderbolt 5 capabilities. M5 Pro and M5 Max feature a new 18-core CPU architecture. It includes six of the highest-performing core design, now called super cores, that are the world’s fastest CPU core.1 Alongside these cores are 12 all-new performance cores, optimized for power-efficient, multithreaded workloads. Collectively, the CPU significantly boosts performance by up to 30 percent for pro workloads.2 The GPU scales up the next-generation architecture introduced in M5 to an up-to-40-core GPU. With a Neural Accelerator in each GPU core and higher unified memory bandwidth, M5 Pro and M5 Max are over 4x the peak GPU compute for AI compared to the previous generation.2 The GPU substantially increases graphics capabilities — now up to 35 percent for apps using ray tracing than M4 Pro and M4 Max — enhancing advanced visual effects and 3D rendering.2 With M5 Pro and M5 Max, the new MacBook Pro is the ultimate powerhouse for pros and is available for pre-order starting tomorrow, with availability beginning Wednesday, March 11.
“M5 Pro and M5 Max are a monumental leap forward for Apple silicon, leveraging our new Fusion Architecture to scale the capabilities of Apple silicon while preserving its core tenets of performance, power efficiency, and unified memory architecture,” said Johny Srouji, Apple’s senior vice president of Hardware Technologies. “Both chips underscore our relentless pace of innovation, integrating the world’s fastest CPU cores, a next-generation GPU with Neural Accelerators, a faster Neural Engine, and high-bandwidth, high-capacity memory — resulting in an unparalleled combination of performance, efficiency, and incredible on-device AI capabilities for MacBook Pro.”
All-New Fusion Architecture
M5 Pro and M5 Max introduce the Apple-designed Fusion Architecture, a state-of-the-art design that connects two dies into a single SoC. This brings together two third-generation 3-nanometer dies with high bandwidth and low latency using advanced packaging. The two dies include a powerful new CPU, scalable GPU, Media Engine, unified memory controller, Neural Engine, and Thunderbolt 5 capabilities.
Apple’s Fastest, Most Advanced CPU Cores
M5 Pro and M5 Max feature a new 18-core CPU with 6 super cores and 12 all-new performance cores.
The industry-leading super core was first introduced as performance cores in M5, which also adopts the super core name for all M5-based products — MacBook Air, the 14-inch MacBook Pro, iPad Pro, and Apple Vision Pro. This core is the highest-performance core design with the world’s fastest single-threaded performance, driven in part by increased front-end bandwidth, a new cache hierarchy, and enhanced branch prediction.1
M5 Pro and M5 Max also introduce an all-new performance core that is optimized to deliver greater power-efficient, multithreaded performance for pro workloads. Together with the super cores, the chips deliver up to 2.5x higher multithreaded performance than M1 Pro and M1 Max.2 The super cores and performance cores give MacBook Pro a huge performance boost to handle the most CPU-intensive pro workloads, like analyzing complex data or running demanding simulations with unparalleled ease.
M5 Pro: Designed to Handle Demanding Workflows
M5 Pro is designed to meet the needs of pro users — like data modelers, post-production sound designers, and STEM students — who require robust processing power and graphics, and ample amounts of unified memory to handle complex projects and workloads.
Scaling up from the M5 chip, M5 Pro pairs the up-to-18-core CPU with a next-generation up-to-20-core GPU featuring a Neural Accelerator in each core. With four additional CPU cores compared to M4 Pro, the new CPU architecture in M5 Pro significantly boosts multithreaded performance by up to 30 percent for pro workloads.2 M5 Pro supports up to 64GB of unified memory with higher unified memory bandwidth up to 307GB/s. With all these features, M5 Pro delivers over 4x the peak GPU compute compared to M4 Pro, and over 6x the peak GPU compute than M1 Pro for AI performance.2
M5 Pro has an enhanced shader core with second-generation dynamic caching and hardware-accelerated mesh shading, delivering significantly increased graphics performance — up to 20 percent higher than M4 Pro and 2.2x higher than M1 Pro.2 And with Apple’s third-generation ray-tracing engine, M5 Pro provides up to a 35 percent graphics uplift in apps using this rendering technique as compared to M4 Pro.2
M5 Max: Unmatched Capabilities
M5 Max is designed for pro users — such as 3D animators, app developers, and AI researchers — who run workloads that demand maximum GPU compute and the highest unified memory bandwidth.
Featuring the same breakthrough GPU architecture with double the cores as M5 Pro, M5 Max pairs the 18-core CPU with an up-to-40-core GPU. The new CPU architecture offers up to 15 percent higher multithreaded performance when compared to M4 Max.2 M5 Max supports up to 128GB of unified memory with higher unified memory bandwidth up to 614GB/s. This bandwidth increase means users achieve incredible results when working with complex scenes, massive datasets, and higher token generation for LLMs. M5 Max offers over 4x the peak GPU compute compared to the previous generation, and over 6x the peak GPU compute than M1 Max for AI performance.2
The graphics performance for M5 Max is up to 20 percent higher than M4 Max and 2.2x higher than M1 Max.2 For apps using ray tracing, M5 Max provides a graphics uplift of up to 30 percent more than M4 Max.2
Advanced Technologies Across M5 Pro and M5 Max
M5 Pro and M5 Max feature a number of additional advanced technologies right on the chip, including:
- A faster 16-core Neural Engine with a higher bandwidth connection to memory to accelerate on-device AI features and Apple Intelligence.3
- Apple’s latest Media Engine with support for hardware-accelerated H.264 and HEVC, AV1 decode, and ProRes encode and decode engines.
- Support for Memory Integrity Enforcement — an industry-first, always-on memory safety protection that does not compromise device performance.
- Thunderbolt 5 ports, each supported by its own custom-designed controller directly on the chip — making this the industry’s most capable implementation of Thunderbolt 5.
Apple Silicon and the Environment
Apple 2030 is the company’s ambitious plan to be carbon neutral across its entire footprint by the end of this decade by reducing product emissions from their three biggest sources: materials, electricity, and transportation. The power-efficient performance of M5 Pro and M5 Max helps MacBook Pro meet Apple’s high standards for energy efficiency, and reduces the total amount of energy consumed over the product’s lifetime.
About Apple Apple revolutionized personal technology with the introduction of the Macintosh in 1984. Today, Apple leads the world in innovation with iPhone, iPad, Mac, AirPods, Apple Watch, and Apple Vision Pro. Apple’s six software platforms — iOS, iPadOS, macOS, watchOS, visionOS, and tvOS — provide seamless experiences across all Apple devices and empower people with breakthrough services including the App Store, Apple Music, Apple Pay, iCloud, and Apple TV. Apple’s more than 150,000 employees are dedicated to making the best products on earth and to leaving the world better than we found it.
- Testing was conducted by Apple in February 2026 using shipping competitive systems and select industry-standard benchmarks.
- Testing was conducted by Apple in February 2026 using preproduction 16-inch MacBook Pro systems with Apple M5 Max, 18-core CPU, 40-core GPU, and 128GB of unified memory; and preproduction 16-inch MacBook Pro systems with Apple M5 Pro, 18-core CPU, 20-core GPU, and 64GB of unified memory; as well as production 16-inch MacBook Pro systems with Apple M4 Max, 16-core CPU, 40-core GPU, and 128GB of unified memory; production 16-inch MacBook Pro systems with Apple M4 Pro, 14-core CPU, 20-core GPU, and 48GB of unified memory; production 16-inch MacBook Pro systems with Apple M1 Max, 10-core CPU, 32-core GPU, and 64GB of unified memory; and production 16-inch MacBook Pro systems with Apple M1 Pro, 10-core CPU, 16-core GPU, and 32GB of unified memory. Performance measured using select industry‑standard benchmarks. Performance tests are conducted using specific computer systems and reflect the approximate performance of MacBook Pro. See apple.com/macbook-pro for more information.
- Apple Intelligence is available in beta with support for these languages: English, Danish, Dutch, French, German, Italian, Norwegian, Portuguese, Spanish, Swedish, Turkish, Vietnamese, Chinese (simplified), Chinese (traditional), Japanese, and Korean. Some features may not be available in all regions or languages. For feature and language availability and system requirements, see support.apple.com/en-us/121115.
Media

Press Contacts
Lauren Klug - Apple
l_klug@apple.comAndrea Schubert - Apple
a_schubert@apple.comApple Media Helpline
media.help@apple.com -
March 3, 2026
PRESS RELEASE
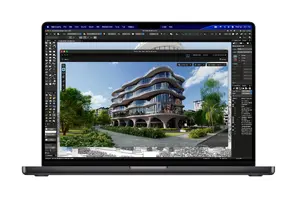
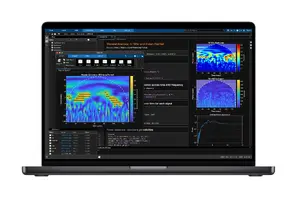
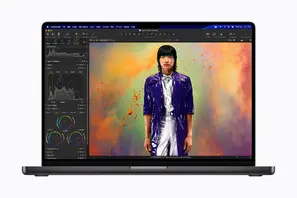
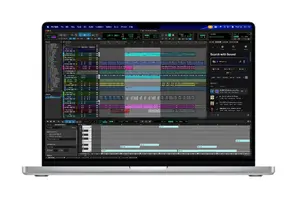
Apple introduces MacBook Pro with all‑new M5 Pro and M5 Max, delivering breakthrough pro performance and next-level on-device AI
The world’s best pro laptop raises the bar again with blazing-fast CPU and GPU performance, plus up to 2x faster SSD speeds and 1TB of starting storage
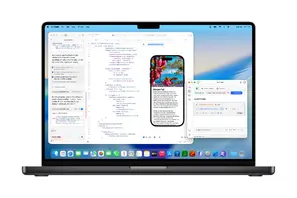
CUPERTINO, CALIFORNIA Apple today announced the latest 14- and 16-inch MacBook Pro with the all-new M5 Pro and M5 Max, bringing game-changing performance and AI capabilities to the world’s best pro laptop. With M5 Pro and M5 Max, MacBook Pro features a new CPU with the world’s fastest CPU core,1 a next-generation GPU with a Neural Accelerator in each core, and higher unified memory bandwidth, altogether delivering up to 4x AI performance compared to the previous generation, and up to 8x AI performance compared to M1 models.2 This allows developers, researchers, business professionals, and creatives to unlock new AI-enabled workflows right on MacBook Pro. It now comes with up to 2x faster SSD performance2 and starts at 1TB of storage for M5 Pro and 2TB for M5 Max. The new MacBook Pro includes N1, an Apple-designed wireless networking chip that enables Wi-Fi 7 and Bluetooth 6, bringing improved performance and reliability to wireless connections. It also offers up to 24 hours of battery life; a gorgeous Liquid Retina XDR display with a nano-texture option; a wide array of connectivity, including Thunderbolt 5; a 12MP Center Stage camera; studio-quality mics; an immersive six-speaker sound system; Apple Intelligence features; and the power of macOS Tahoe. The new MacBook Pro comes in space black and silver, and is available to pre-order starting tomorrow, March 4, with availability beginning Wednesday, March 11.
“MacBook Pro with M5 Pro and M5 Max redefines what’s possible on a pro laptop, now up to 4x faster than the previous generation,” said John Ternus, Apple’s senior vice president of Hardware Engineering. “With Neural Accelerators in the GPU, the new MacBook Pro enables professionals to run advanced LLMs on device and unlock capabilities that no other laptop can do — all while maintaining exceptional battery life. Combined with even faster unified memory and storage, it empowers users to take their work even further, unleashing new possibilities and pushing the boundaries of what they can do.”
Blazing Performance with M5 Pro and M5 Max
M5 Pro and M5 Max are built using the new Apple-designed Fusion Architecture and engineered from the ground up for AI. This innovative design combines two dies into a single system on a chip, providing tremendous performance boosts. M5 Pro and M5 Max feature a new up-to-18-core CPU with 6 super cores, the world’s fastest CPU core,1 and 12 all-new performance cores, optimized for power-efficient, multithreaded pro workloads — altogether delivering up to 30 percent faster performance.3 M5 Pro is designed for users running complex workflows, like coders optimizing algorithms and photographers processing massive image libraries, while M5 Max is for those pushing the absolute limits, such as engineers running rigorous simulations.
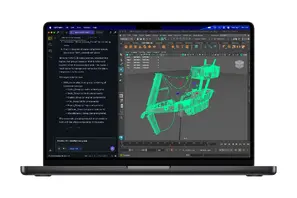
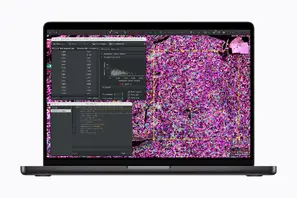
Scaling up performance from M5 and offering the same breakthrough GPU architecture with a Neural Accelerator in each core, M5 Pro and M5 Max deliver up to 4x faster LLM prompt processing than M4 Pro and M4 Max, and up to 8x AI image generation than M1 Pro and M1 Max.2 This enables AI researchers and developers to train custom models locally, and creative professionals to leverage AI-powered tools for video editing, music production, and design work. Both chips also bring up to a 50 percent increase in graphics performance compared to M4 Pro and M4 Max,3,4 enabling motion designers to work with complex 3D scenes in real time and VFX artists to preview effects instantly. And with a faster and more power-efficient Neural Engine and higher unified memory bandwidth, the new MacBook Pro delivers incredible on-device AI capabilities. The increase in unified memory bandwidth enables complex workflows like intensive AI model training and massive video projects. M5 Pro supports up to 64GB of unified memory with up to 307GB/s of memory bandwidth, while M5 Max supports up to 128GB of unified memory with up to 614GB/s of memory bandwidth.
14- and 16-inch MacBook Pro with M5 Pro deliver:2
- Up to 7.8x faster AI image generation performance when compared to MacBook Pro with M1 Pro, and up to 3.7x faster than MacBook Pro with M4 Pro.
- Up to 6.9x faster LLM prompt processing when compared to MacBook Pro with M1 Pro, and up to 3.9x faster than MacBook Pro with M4 Pro.
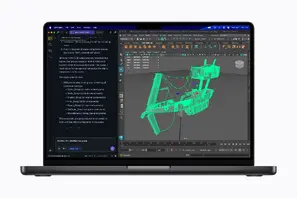
- Up to 5.2x faster 3D rendering in Maxon Redshift when compared to MacBook Pro with M1 Pro, and up to 1.4x faster than MacBook Pro with M4 Pro.
- Up to 1.6x faster gaming performance with ray tracing in games like Cyberpunk 2077: Ultimate Edition when compared to MacBook Pro with M4 Pro.
14- and 16-inch MacBook Pro with M5 Max deliver:2
- Up to 8x faster AI image generation performance when compared to MacBook Pro with M1 Max, and up to 3.8x faster than MacBook Pro with M4 Max.
- Up to 6.7x faster LLM prompt processing when compared to MacBook Pro with M1 Max, and up to 4x faster than MacBook Pro with M4 Max.
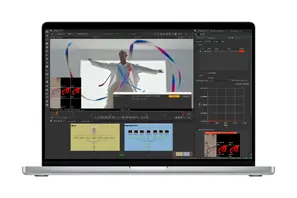
- Up to 5.4x faster video effects rendering performance in Blackmagic DaVinci Resolve Studio when compared to MacBook Pro with M1 Max, and up to 3x faster than MacBook Pro with M4 Max.
- Up to 3.5x faster AI video-enhancing performance in Topaz Video when compared to MacBook Pro with M4 Max.
Faster Storage Performance and Increased Starting Storage
The new MacBook Pro delivers up to 2x faster read/write performance compared to the previous generation,4 reaching speeds of up to 14.5GB/s5 and accelerating workflows for professionals working across 4K and 8K video projects, LLMs, and complex datasets. MacBook Pro with M5 Pro now comes standard with 1TB of storage, while MacBook Pro with M5 Max now comes standard with 2TB. And the 14-inch MacBook Pro with M5 now comes standard with 1TB of storage.
Even More Value for Upgraders
The new 14- and 16-inch MacBook Pro with M5 Pro and M5 Max mark a major leap for pro users. There’s never been a better time for customers to upgrade from a previous generation of MacBook Pro with Apple silicon or an Intel-based Mac.
- Enhanced AI performance with Neural Accelerators in the GPU: Users upgrading from M1 models will experience up to 8x faster AI performance.2
- Exceptional battery life: The new MacBook Pro gets up to 24 hours of battery life, giving Intel-based upgraders up to 13 additional hours, and users coming from M1 models will get up to three more hours, so they can get more done on a single charge.2 And unlike many PC laptops, MacBook Pro delivers the same incredible performance whether plugged in or on battery. Users will be able to fast-charge up to 50 percent in just 30 minutes using a 96W or higher USB-C power adapter.2
- Best display in a pro laptop: Upgraders will enjoy the Liquid Retina XDR display, which features 1600 nits peak HDR brightness and up to 1000 nits for SDR content, and offers a nano-texture option.
- Comprehensive connectivity: The new MacBook Pro has a wide array of connectivity options, including three Thunderbolt 5 ports for high-speed data transfer, HDMI that supports up to 8K resolution, an SDXC card slot for quick media import, and MagSafe 3 with fast-charge capability. Upgraders can also drive up to two high-resolution external displays with M5 Pro, and up to four high-resolution displays with M5 Max, providing the flexibility to create expansive workspaces.
- Wi-Fi 7 and Bluetooth 6: With the Apple N1 chip, Wi-Fi 7 and Bluetooth 6 bring improved performance and reliability to wireless connections.
- Advanced camera, mics, and speakers: Featuring a 12MP Center Stage camera with Desk View support and studio-quality mics, the new MacBook Pro will allow users to look and sound their best while taking calls. They will also experience an immersive six-speaker sound system with support for Spatial Audio.
An Unrivaled Experience with macOS Tahoe
macOS Tahoe transforms the MacBook Pro experience with powerful capabilities that turbocharge productivity.6 Major updates to Spotlight make it easier to find relevant apps and files and immediately take action right from the search bar. Apple Intelligence is even more capable while protecting users’ privacy at every step.7 Shortcuts get even more powerful with intelligent actions and the ability to tap directly in to Apple Intelligence models. Integrated into Messages, FaceTime, and the Phone app, Live Translation helps users easily communicate across languages, translating text and audio.7 Additionally, developers can bring Apple Intelligence capabilities into their applications or tap in to the Foundation Models framework for specialized on-device intelligence tasks. Continuity features include the Phone app on Mac, which lets users relay cellular calls from their nearby iPhone, and with Live Activities from iPhone, they can stay on top of things happening in real time.6 macOS Tahoe also features a beautiful new design with Liquid Glass, and users can personalize their Mac in even more ways with an updated Control Center, in addition to new color options for folders, app icons, and widgets.
MacBook Pro and the Environment
MacBook Pro was built with the environment in mind, and brings Apple even closer to reaching its ambitious plan to be carbon neutral across its entire footprint by 2030. It is made with 45 percent recycled content,8 including 100 percent recycled aluminum in the enclosure and 100 percent recycled cobalt in the battery. It is manufactured with 50 percent renewable electricity, such as wind and solar, across the supply chain. The new MacBook Pro is designed to be durable and repairable, and also offers industry-leading software support, while meeting Apple’s high standards for energy efficiency and safer chemistry. The paper packaging is 100 percent fiber-based and can be easily recycled.9
Pricing and Availability
- Customers can pre-order the new 14- and 16-inch MacBook Pro models with M5 Pro and M5 Max starting tomorrow, March 4, on apple.com/store and in the Apple Store app in 33 countries and regions, including the U.S. All models will begin arriving to customers, and will be in Apple Store locations and Apple Authorized Resellers, starting Wednesday, March 11.
- The 14‑inch MacBook Pro with M5 Pro starts at $2,199 (U.S.) and $2,049 (U.S.) for education; and the 16‑inch MacBook Pro with M5 Pro starts at $2,699 (U.S.) and $2,499 (U.S.) for education.
- The 14‑inch MacBook Pro with M5 Max starts at $3,599 (U.S.) and $3,299 (U.S.) for education; and the 16‑inch MacBook Pro with M5 Max starts at $3,899 (U.S.) and $3,599 (U.S.) for education. All models are available in space black and silver.
- Additional technical specifications, configure-to-order options, and accessories are available at apple.com/mac.
- The 14-inch MacBook Pro with M5 now comes standard with 1TB of storage, and is available in space black and silver, starting at $1,699 (U.S.) and $1,599 (U.S.) for education.
- With Apple Trade In, customers can trade in their current computer and get credit toward a new Mac. Customers can visit apple.com/shop/trade-in to see what their device is worth.
- AppleCare delivers exceptional service and support, with flexible options for Apple users. Customers can choose AppleCare+ to cover their new Mac, or in the U.S., AppleCare One to protect multiple products in one simple plan. Both plans include coverage for accidents like drops and spills, theft and loss protection on eligible products, battery replacement service, and 24/7 support from Apple Experts. For more information, visit apple.com/applecare.
- Every customer who buys directly from Apple Retail gets access to Personal Setup. In these guided online sessions, a Specialist can walk them through setup or focus on features that will help them make the most of their new device. Customers can also learn more about getting started and going further with their new device with a Today at Apple session at their nearest Apple Store.
- Customers in the U.S. who shop at Apple using Apple Card can pay monthly at 0 percent APR when they choose to check out with Apple Card Monthly Installments, and they’ll get 3 percent Daily Cash back — all up front. More information — including details on eligibility, exclusions, and Apple Card terms — is available at apple.com/apple-card/monthly-installments.
About Apple Apple revolutionized personal technology with the introduction of the Macintosh in 1984. Today, Apple leads the world in innovation with iPhone, iPad, Mac, AirPods, Apple Watch, and Apple Vision Pro. Apple’s six software platforms — iOS, iPadOS, macOS, watchOS, visionOS, and tvOS — provide seamless experiences across all Apple devices and empower people with breakthrough services including the App Store, Apple Music, Apple Pay, iCloud, and Apple TV. Apple’s more than 150,000 employees are dedicated to making the best products on earth and to leaving the world better than we found it.
- Testing was conducted by Apple in February 2026 using shipping competitive systems and select industry-standard benchmarks.
- Testing was conducted by Apple in January and February 2026. See apple.com/macbook-pro for more information.
- Results are compared to previous-generation 16-inch MacBook Pro with Apple M4 Pro, 14-core CPU, 20-core GPU, 48GB of unified memory, and a 4TB SSD.
- Results are compared to previous-generation 16-inch MacBook Pro with Apple M4 Max, 16-core CPU, 40-core GPU, 128GB of unified memory, and an 8TB SSD.
- Testing was conducted by Apple in January and February 2026 using preproduction 16-inch MacBook Pro systems with Apple M5 Max, 18-core CPU, 40-core GPU, 128GB of unified memory, and an 8TB SSD. Tested with FIO 3.41, 1024KB request size, 10GB test file and IO depth=8. Performance tests are conducted using specific computer systems and reflect the approximate performance of MacBook Pro.
- macOS Tahoe is available as a free software update. Some features may not be available in all regions or in all languages. See requirements at apple.com/os/macos.
- Apple Intelligence is available in beta with support for these languages: English, Danish, Dutch, French, German, Italian, Norwegian, Portuguese, Spanish, Swedish, Turkish, Vietnamese, Chinese (simplified), Chinese (traditional), Japanese, and Korean. Some features may not be available in all regions or languages. For feature and language availability and system requirements, see support.apple.com/en-us/121115.
- Product recycled or renewable content is the mass of certified recycled material relative to the overall mass of the device, not including packaging or in-box accessories.
- Breakdown of U.S. retail packaging by weight. Adhesives, inks, and coatings are excluded from calculations.
Media


Press Contacts
Lizette Viviana Du Pond - Apple
ldupond@apple.comStarlayne Meza - Apple
starlayne_meza@apple.comApple Media Helpline
media.help@apple.com -
March 3, 2026
PRESS RELEASE
Apple introduces the new MacBook Air with M5
The world’s most popular laptop gets even better with the incredible performance of M5, double the starting storage, and improved wireless connectivity, packed into a thin, light, and durable aluminum design
CUPERTINO, CALIFORNIA Apple today announced the new MacBook Air with M5, bringing exceptional performance and expanded AI capabilities to the world’s most popular laptop. M5 features a faster CPU and next-generation GPU with a Neural Accelerator in each core, enabling MacBook Air to power through a variety of workflows, from creative projects to complex AI tasks. MacBook Air now comes standard with double the starting storage at 512GB with faster SSD technology, and is configurable up to 4TB, so customers can keep their most important work on hand. Apple’s N1 wireless chip delivers Wi-Fi 7 and Bluetooth 6 for seamless connectivity on the go. MacBook Air features a beautifully thin, light, and durable aluminum design, stunning Liquid Retina display, 12MP Center Stage camera, up to 18 hours of battery life, an immersive sound system with Spatial Audio, and two Thunderbolt 4 ports with support for up to two external displays. Combined with the power of macOS Tahoe and Apple Intelligence, MacBook Air delivers unmatched value for college students and creative professionals, and it’s the most popular laptop for business users. Available in 13- and 15-inch models in sky blue, midnight, starlight, and silver, the new MacBook Air with M5 is available for pre-order starting tomorrow, March 4, with availability beginning Wednesday, March 11.
“The new MacBook Air with M5 brings incredible performance and even more capability to the world’s most popular laptop,” said John Ternus, Apple’s senior vice president of Hardware Engineering. “With M5, MacBook Air powers through a wide range of tasks, from everyday productivity to creative workloads, and is even faster for AI. Now featuring double the starting storage, as well as Wi-Fi 7 and Bluetooth 6, in a sleek and durable design with long battery life, MacBook Air is the perfect laptop for anyone who values the unrivaled combination of performance and portability.”
Incredible Performance with M5 — for AI and Beyond
M5 delivers incredible performance for everything users want to tackle, from everyday productivity to creative workflows. MacBook Air with M5 features a 10-core CPU with the world’s fastest CPU core for even more responsiveness.1 Combined with an up-to-10-core GPU with a powerful Neural Accelerator in each core, MacBook Air with M5 delivers up to 4x faster performance for AI tasks than MacBook Air with M4, and up to 9.5x faster than MacBook Air with M1.2 This makes it an incredibly capable platform for AI — whether using Apple Intelligence across apps and system experiences at home, or running LLMs on device in an enterprise.3
With enhanced shader cores and a third-generation ray-tracing engine, M5 supercharges tasks like gaming and 3D rendering. M5 also features faster unified memory with 153GB/s of bandwidth — a 28 percent improvement over M4 — enabling even smoother multitasking and faster app launches. All combined, MacBook Air with M5 brings even greater performance compared to previous generations, offering:
- Up to 6.9x faster AI video enhancement performance in Topaz Video when compared to MacBook Air with M1, and up to 1.9x faster than MacBook Air with M4.2
- Up to 6.5x faster 3D rendering with ray-tracing performance in Blender when compared to MacBook Air with M1, and up to 1.5x faster than MacBook Air with M4.4,5
- Up to 2.7x faster image processing performance in Affinity when compared to MacBook Air with M1, and up to 1.5x faster than MacBook Air with M4.2
- Web browsing is up to 50 percent faster when compared to a PC laptop with an Intel Core Ultra X7 processor, and more demanding tasks get up to 2x faster performance.2
Double the Starting Storage and a Faster SSD
MacBook Air with M5 now comes standard with 512GB of storage — double that of the previous generation — and can be configured up to 4TB for the first time, providing ample space for large projects and games. The new SSD also delivers 2x faster read/write performance compared to the previous generation, significantly accelerating file access and speeding up workflows for users, such as creators importing large photo libraries and students running AI workloads on device.5
Tremendous Value for Upgraders with the World’s Most Popular Laptop
There’s never been a better time for customers upgrading from a previous generation of MacBook Air with Apple silicon or an Intel-based Mac. In addition to the blazing performance of M5, the new MacBook Air delivers a broad range of compelling features, including:
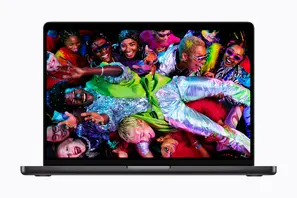
- A stunning Liquid Retina display: A brilliant 13.6- or 15.3-inch Liquid Retina display with 500 nits of brightness and support for 1 billion colors makes content look vivid with sharp detail, and text appears super crisp.
- Exceptional battery life: Up to 18 hours of battery life — six additional hours when compared to an Intel-based MacBook Air — with fast-charge capability means users can work, create, or play all day without plugging in.2
- Beautiful design and colors: The 13-inch MacBook Air provides the ultimate in portability for users on the go, while the 15-inch model offers even more screen real estate for multitasking. Both models feature a thin, light, and completely silent fanless design that’s available in four gorgeous colors: sky blue, midnight, starlight, and silver.
- Advanced camera, mics, and speakers: A 12MP Center Stage camera with support for Desk View keeps users looking great and enables more engaging video calls; a three-mic array brings enhanced voice clarity; and an immersive sound system with support for Spatial Audio and Dolby Atmos creates an enjoyable three-dimensional soundstage for music and movies.
- Wi-Fi 7 and Bluetooth 6: N1, the new Apple-designed wireless networking chip, enables Wi-Fi 7 and Bluetooth 6, delivering improved performance and reliability.
- Seamless connectivity: MacBook Air features two Thunderbolt 4 ports for connecting accessories with support for up to two external displays — ideal for professionals and students who need to expand their workspace. MagSafe enables dedicated charging and peace of mind when users are plugged in.
The Power of macOS Tahoe
macOS completes the MacBook Air experience, with incredible features and built-in apps, such as Safari, Photos, Messages, and FaceTime, that enable users to get even more done. With macOS Tahoe, a beautiful design with Liquid Glass lets users personalize their Mac in new ways with color options for folders, app icons, and widgets.6 Apple Intelligence adds powerful features with groundbreaking privacy at every step — including Live Translation in Messages to communicate across languages, updates in Reminders that automatically categorize the most relevant actions, and more powerful Shortcuts actions that tap directly in to Apple Intelligence models to create automations, such as extracting information from a PDF and adding key details to a spreadsheet.3 Continuity features include the Phone app on Mac, which lets users relay cellular calls from their nearby iPhone, and they can stay on top of notifications with Live Activities, which open in iPhone Mirroring so users can take immediate action right from their Mac.7 Additionally, for video calls, a new Edge Light effect provides a pleasing fill light to evenly illuminate a user’s face in any lighting condition.
MacBook Air and the Environment
MacBook Air with M5 was built with the environment in mind, and brings Apple even closer to reaching its ambitious plan to be carbon neutral across its entire footprint by 2030. It is made with 55 percent recycled content,8 including 100 percent recycled aluminum in the enclosure and 100 percent recycled cobalt in the battery. It is manufactured with 50 percent renewable electricity, such as wind and solar, across the supply chain. MacBook Air is designed to be durable and repairable, while meeting Apple’s high standards for energy efficiency and safer chemistry. The paper packaging is 100 percent fiber-based and can be easily recycled.9
Pricing and Availability
- Customers can pre-order the new 13- and 15-inch MacBook Air with M5 beginning at 6:15 a.m. PST on Wednesday, March 4, on apple.com/store and in the Apple Store app in 33 countries and regions, including the U.S. All models will begin arriving to customers, and will be in Apple Store locations and Apple Authorized Resellers, starting Wednesday, March 11.
- The 13-inch MacBook Air with M5 starts at $1,099 (U.S.), and $999 (U.S.) for education, and the 15-inch MacBook Air with M5 starts at $1,299 (U.S.) and $1,199 (U.S.) for education. Both are available in sky blue, midnight, starlight, and silver.
- Additional technical specifications, configure-to-order options, and accessories are available at apple.com/mac.
- With Apple Trade In, customers can trade in their current computer and get credit toward a new Mac. Customers can visit apple.com/shop/trade-in to see what their device is worth.
- AppleCare delivers exceptional service and support, with flexible options for Apple users. Customers can choose AppleCare+ to cover their new Mac, or in the U.S., AppleCare One to protect multiple products in one simple plan. Both plans include coverage for accidents like drops and spills, theft and loss protection on eligible products, battery replacement service, and 24/7 support from Apple Experts. For more information, visit apple.com/applecare.
- Every customer who buys directly from Apple Retail gets access to Personal Setup. In these guided online sessions, a Specialist can walk them through setup, or focus on features that will help them make the most of their new device. Customers can also learn more about getting started and going further with their new device with a Today at Apple session at their nearest Apple Store.
- Customers in the U.S. who shop at Apple using Apple Card can pay monthly at 0 percent APR when they choose to check out with Apple Card Monthly Installments, and they’ll get 3 percent Daily Cash back — all up front. More information — including details on eligibility, exclusions, and Apple Card terms — is available at apple.com/apple-card/monthly-installments.
About Apple Apple revolutionized personal technology with the introduction of the Macintosh in 1984. Today, Apple leads the world in innovation with iPhone, iPad, Mac, AirPods, Apple Watch, and Apple Vision Pro. Apple’s six software platforms — iOS, iPadOS, macOS, watchOS, visionOS, and tvOS — provide seamless experiences across all Apple devices and empower people with breakthrough services including the App Store, Apple Music, Apple Pay, iCloud, and Apple TV. Apple’s more than 150,000 employees are dedicated to making the best products on earth and to leaving the world better than we found it.
- Testing was conducted by Apple in February 2025 using shipping competitive systems and select industry-standard benchmarks.
- Testing was conducted by Apple in February 2026. See apple.com/macbook-air for more information.
- Apple Intelligence is available in beta with support for these languages: English, Danish, Dutch, French, German, Italian, Norwegian, Portuguese, Spanish, Swedish, Turkish, Vietnamese, Chinese (simplified), Chinese (traditional), Japanese, and Korean. Some features may not be available in all regions or languages. For feature and language availability and system requirements, see support.apple.com/en-us/121115.
- Results are compared to MacBook Air with Apple M1, 8-core CPU, 8-core GPU, 16GB of unified memory, and a 2TB SSD.
- Results are compared to MacBook Air systems with Apple M4, 10-core CPU, 10-core GPU, 32GB of unified memory, and a 2TB SSD.
- macOS Tahoe is available as a free software update. Some features may not be available in all regions or in all languages. See requirements at apple.com/os/macos.
- Requires that iPhone, with an active carrier plan, and Mac are signed in with the same Apple Account, iPhone and Mac are near each other, signed in to FaceTime with the same Apple Account, have Wi-Fi turned on, and are connected to the same network.
- Product recycled or renewable content is the mass of certified recycled material relative to the overall mass of the device, not including packaging or in-box accessories.
- Breakdown of U.S. retail packaging by weight. Adhesives, inks, and coatings are excluded from calculations.¨
Media


Press Contacts
Jessica Reeves - Apple
j_reeves@apple.comStarlayne Meza - Apple
starlayne_meza@apple.comApple Media Helpline
media.help@apple.com -
March 2, 2026
PRESS RELEASE
Apple introduces the new iPad Air, powered by M4
With blazing performance, more memory, enhanced connectivity, and game-changing iPadOS 26 features, iPad Air is a fantastic value
CUPERTINO, CALIFORNIA Apple today announced the new iPad Air featuring M4 and more memory, giving users a big jump in performance at the same starting price. With a faster CPU and GPU, iPad Air boosts tasks like editing and gaming, and is a powerful device for AI with a faster Neural Engine, higher memory bandwidth, and 50 percent more unified system memory than the previous generation. With M4, iPad Air is up to 30 percent faster than iPad Air with M3,1 and up to 2.3x faster than iPad Air with M1.2 The new iPad Air also features the latest in Apple silicon connectivity chips, N1 and C1X, delivering fast wireless and cellular connections — and support for Wi-Fi 7 — that empower users to work and be creative anywhere.3 Available in two sizes and four gorgeous finishes that users love, the 11-inch iPad Air is super portable, and the 13-inch model provides an even larger display for those who want more space to multitask. With game-changing iPadOS 26 capabilities, advanced cameras, all-day battery life, a powerful app ecosystem, and support for accessories like Apple Pencil Pro and Magic Keyboard, iPad Air delivers a remarkable and versatile experience for anyone who wants to do more on iPad, from students and creators, to business users and gamers.4
With the same starting price of just $599 for the 11-inch model and $799 for the 13-inch model, the new iPad Air is an incredible value. And for education, the 11-inch iPad Air starts at $549, and the 13-inch model starts at $749. Customers can pre-order iPad Air starting Wednesday, March 4, with availability beginning Wednesday, March 11.
“iPad Air gives users more ways than ever to be creative and productive, offering powerful performance and incredible versatility to help them turn their ideas into reality,” said Bob Borchers, Apple’s vice president of Worldwide Product Marketing. “With its blazing performance thanks to M4, incredible AI capabilities, and game-changing iPadOS 26 features, there’s never been a better time to choose or upgrade to iPad Air.”
Even More Performance with M4
M4 brings a significant boost in performance to the new iPad Air, empowering users to be productive and creative wherever they are — from aspiring creatives working with large files to travelers editing content on the go. Featuring an 8-core CPU and a 9-core GPU, iPad Air is up to 30 percent faster than iPad Air with M3 and up to 2.3x faster than iPad Air with M1.5 Users will notice the blazing speed of M4 in everything they do — with Apple Creator Studio, compositing photos in Pixelmator Pro or editing video in Final Cut Pro is quicker than ever. With the 9-core GPU of M4, iPad Air supports second-generation hardware-accelerated mesh shading and ray tracing for incredible graphics performance. M4 delivers over 4x faster 3D pro rendering with ray tracing performance compared to iPad Air with M1, offering more accurate lighting, reflections, and shadows for extremely realistic gaming experiences.2
Next-Level Power for AI
M4 is also powerful for AI, with faster memory bandwidth and an incredibly fast Neural Engine — benefiting everyone from college students transcribing lecture notes, to creators storyboarding a new project, to business users polishing emails. With the new iPad Air, unified memory jumps 50 percent, to 12GB, and memory bandwidth increases to 120GB/s, helping users run AI models faster. The 16-core Neural Engine is 3x faster than that of M1 and is perfect for everyday tasks that use on-device AI, like searching for subjects and texts in photos, or leveraging powerful AI features in apps like Goodnotes and Onform: Video Analysis App.2 The Neural Engine also powers capabilities in Apple Creator Studio apps, like removing the background of video footage with Scene Removal Mask in Final Cut Pro.
N1 and C1X Come to iPad Air for Faster Connectivity
iPad Air features N1, an Apple-designed wireless networking chip that enables Wi-Fi 7, Bluetooth 6, and Thread.3 N1 brings better performance when connected to 5GHz Wi-Fi networks, and improves the overall performance and reliability of features like Personal Hotspot and AirDrop. Cellular models of iPad Air also feature C1X, a cellular modem designed by Apple that offers up to 50 percent faster cellular data performance — and for active cellular users, C1X offers up to 30 percent less modem energy usage than iPad Air with M3.1 Cellular models of iPad Air allow users to enjoy GPS capabilities, so they can navigate with even more confidence. Users can also enjoy 5G cellular support, helping them stay connected for work or leisure all around the world.6 And with eSIM, users can quickly and securely add a new plan, connect and transfer existing cellular plans digitally, and stay in touch with family and friends regardless of Wi-Fi availability — ideal for business travelers, students on campus, and anyone working on the go.
iPadOS 26 Supercharges the iPad Experience
iPadOS 26 offers powerful features that help users handle creative and professional tasks with ease, pushing the capabilities of iPad even further.
- The beautiful new design is crafted with Liquid Glass, a translucent material that reflects and refracts its surroundings while reacting to users’ input, and dynamically transforming to bring greater focus to the content they care about most.
- An entirely new, powerful, and intuitive windowing system helps users control, organize, and switch between apps, all while maintaining the simplicity of iPad. And with a new menu bar, users can access the commands available in an app with a simple swipe down from the top of the display, or by moving their cursor to the top.
- Users can manage, access, and organize files with a supercharged Files app that features an updated List view and new folder customization options. With folders in the Dock, users can conveniently access downloads, documents, and more from anywhere. Additionally, they can set a default app for opening specific files or file types.
- The Preview app on iPad gives users a dedicated app for creating a quick sketch, as well as viewing, editing, and marking up PDFs and images with Apple Pencil or by touch.
- Taking advantage of Apple silicon, iPadOS 26 unlocks new capabilities for users with control over their audio input, the ability to capture high-quality recordings with local capture, and Background Tasks.
Advanced Accessories for iPad Air
From sketching ideas to getting work done, Apple Pencil and Magic Keyboard unlock new levels of creativity and productivity on iPad Air.4 Apple Pencil (USB-C) and Apple Pencil Pro offer users two incredible options. Apple Pencil (USB-C) is a great value for essential tasks like note taking and sketching, and Apple Pencil Pro delivers the ultimate experience, enabling users to take advantage of capabilities such as squeeze and barrel roll to bring their ideas to life in entirely new ways. Apple Pencil Pro also supports Find My, helping users locate it if misplaced.
Magic Keyboard for iPad Air provides an amazing typing experience and expands what users can do, with a built-in trackpad ideal for precision tasks like selecting text, and a 14-key function row that allows easy access to features like screen brightness and volume controls. It attaches magnetically, and the Smart Connector immediately connects power and data without the need for Bluetooth; a machined aluminum hinge also includes a USB-C connector for charging. Magic Keyboard for iPad Air has a magical floating design customers love, and comes in black and white.
Ideal for iPad and iPad Air Upgraders
With game-changing improvements over iPad and earlier iPad Air models, there’s never been a better time to upgrade.
- Big performance gains: Upgraders will enjoy enhanced speed and responsiveness with 12GB of unified memory and 120GB/s of memory bandwidth, and will experience even more seamless windowing in iPadOS 26. Users coming from iPad Air with M1 will see up to 2.3x faster performance, with over 4x faster 3D pro rendering with ray tracing performance.5
- Advanced Center Stage camera, mics, and speakers: Users coming from iPad Air with M1 will also enjoy a front 12MP Center Stage camera located along the landscape edge, as well as landscape stereo speakers. For upgraders coming from M1, the 13-inch model delivers even better sound quality, which is great for enjoying music and videos.
- Powerful Apple Intelligence capabilities: Built seamlessly into iPadOS with groundbreaking privacy, Apple Intelligence provides upgraders and new iPad users with intuitive features that make their experience even more helpful and powerful.7
- Even more value: Users coming from previous-generation iPad Air models will get faster connectivity with N1 and C1X, and M1 upgraders will also get 128GB of starting storage. iPad Air with M4 has the same starting price at just $599 for the 11-inch model, and $799 for the 13-inch model.
iPad Air and the Environment
Apple 2030 is the company’s ambitious plan to be carbon neutral across its entire footprint by the end of this decade by reducing product emissions from their three biggest sources: materials, electricity, and transportation. iPad Air is made with 30 percent recycled content,8 including 100 percent recycled aluminum in the enclosure and 100 percent recycled cobalt in the battery. It is manufactured with 40 percent renewable electricity, like wind and solar, across the supply chain. iPad Air is designed to be durable and repairable, and also offers industry-leading software support, while meeting Apple’s high standards for energy efficiency and safe chemistry. The paper packaging is 100 percent fiber-based and can be easily recycled.9
Pricing and Availability
- Customers can pre-order the new iPad Air with M4 starting Wednesday, March 4, at apple.com and in the Apple Store app in 35 countries and regions, including the U.S. It will begin arriving to customers, and will be in Apple Store locations and Apple Authorized Resellers, starting Wednesday, March 11.
- The 11-inch and 13-inch iPad Air with M4 will be available in blue, purple, starlight, and space gray, with 128GB, 256GB, 512GB, and 1TB configurations.
- The 11-inch iPad Air starts at $599 (U.S.) for the Wi-Fi model, and $749 (U.S.) for the Wi-Fi + Cellular model. The 13-inch iPad Air starts at $799 (U.S.) for the Wi-Fi model, and $949 (U.S.) for the Wi-Fi + Cellular model.
- With education savings, the 11-inch iPad Air starts at $549 (U.S.), and the 13-inch iPad Air starts at $749 (U.S.).
- Magic Keyboard, available in black and white, is compatible with the 11-inch and 13-inch iPad Air. The 11-inch Magic Keyboard is available for $269 (U.S.), and the 13-inch Magic Keyboard is available for $319 (U.S.). With education savings, the 11-inch Magic Keyboard is available for $249 (U.S.), and the 13-inch Magic Keyboard is available for $299 (U.S.).
- Apple Pencil Pro and Apple Pencil (USB-C) are compatible with the new iPad Air. Apple Pencil Pro is available for $129 (U.S.), and $119 (U.S.) with education savings. Apple Pencil (USB-C) is available for $79 (U.S.), and $69 (U.S.) with education savings.
- AppleCare delivers exceptional service and support, with flexible options for Apple users. Customers can choose AppleCare+ to cover their new iPad, or in the U.S., AppleCare One to protect multiple products in one simple plan. Both plans include coverage for accidents like drops and spills, theft and loss protection on eligible products, battery replacement service, and 24/7 support from Apple Experts. For more information, visit apple.com/applecare.
- Apple offers great ways to save on the latest iPad. Customers can trade in their current iPad and get credit toward a new one by visiting the Apple Store online, the Apple Store app, or an Apple Store location. To see what their device is worth, and for terms and conditions, customers can visit apple.com/shop/trade-in.
- Customers in the U.S. who shop at Apple using Apple Card can pay monthly at 0 percent APR when they choose to check out with Apple Card Monthly Installments, and they’ll get 3 percent Daily Cash back — all up front. More information — including details on eligibility, exclusions, and Apple Card terms — is available at apple.com/apple-card/monthly-installments.
About Apple Apple revolutionized personal technology with the introduction of the Macintosh in 1984. Today, Apple leads the world in innovation with iPhone, iPad, Mac, AirPods, Apple Watch, and Apple Vision Pro. Apple’s six software platforms — iOS, iPadOS, macOS, watchOS, visionOS, and tvOS — provide seamless experiences across all Apple devices and empower people with breakthrough services including the App Store, Apple Music, Apple Pay, iCloud, and Apple TV. Apple’s more than 150,000 employees are dedicated to making the best products on earth and to leaving the world better than we found it.
- Results are compared to 13-inch iPad Air (M3) units with 8-core CPU and 8GB of unified memory.
- Results are compared to iPad Air (5th generation) units with 8-core CPU and 8GB of unified memory.
- Wi-Fi 7 is available in countries and regions where supported.
- Accessories sold separately.
- Testing was conducted by Apple in January and February 2026. See apple.com/ipad-air for more information.
- Data plan is required. 5G is available in select markets and through select carriers. Speeds vary based on site conditions and carrier. For details on 5G support, contact carrier and see apple.com/ipad/cellular.
- Apple Intelligence is available in beta with support for these languages: English, Danish, Dutch, French, German, Italian, Norwegian, Portuguese, Spanish, Swedish, Turkish, Vietnamese, Chinese (simplified), Chinese (traditional), Japanese, and Korean. Some features may not be available in all regions or languages. For feature and language availability and system requirements, see support.apple.com/en-us/121115.
- Product recycled or renewable content is the mass of certified recycled material relative to the overall mass of the device, not including packaging or in-box accessories.
- Breakdown of U.S. retail packaging by weight. Adhesives, inks, and coatings are excluded from Apple’s calculations.
Images
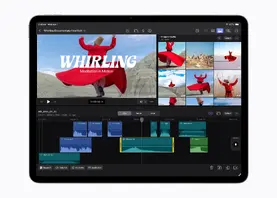
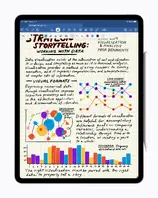
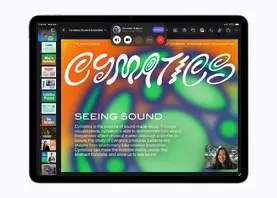
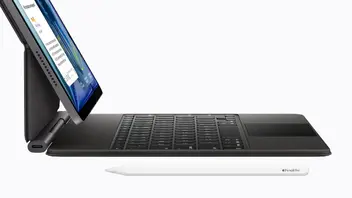
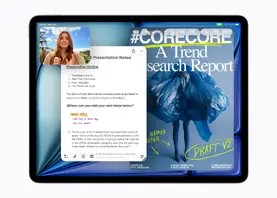
Press Contacts
Skylar Eisenhart - Apple
s_eisenhart@apple.comTara Courtney - Apple
tcourtney@apple.comApple Media Helpline
media.help@apple.com -
March 2, 2026
PRESS RELEASE
Apple introduces iPhone 17e
iPhone 17e delivers incredible value with faster performance, an advanced camera system, enhanced durability, the magic of MagSafe, and double the starting storage at 256GB
CUPERTINO, CALIFORNIA Apple today announced iPhone 17e, a powerful and more affordable addition to the iPhone 17 lineup. At the heart of iPhone 17e is the latest-generation A19, which delivers exceptional performance for everything users do. iPhone 17e also features C1X, the latest-generation cellular modem designed by Apple, which is up to 2x faster than C1 in iPhone 16e. The 48MP Fusion camera captures stunning photos, including next-generation portraits, and 4K Dolby Vision video. It also enables an optical-quality 2x Telephoto — like having two cameras in one. The 6.1-inch Super Retina XDR display features Ceramic Shield 2, offering 3x better scratch resistance than the previous generation and reduced glare.1 With MagSafe, users can enjoy fast wireless charging and access to a vast ecosystem of accessories like chargers and cases. And when iPhone 17e users are outside of cellular and Wi-Fi coverage, Apple’s groundbreaking satellite features — including Emergency SOS, Roadside Assistance, Messages, and Find My via satellite — help them stay connected when it matters most.2
Available in three elegant colors with a premium matte finish — black, white, and a beautiful new soft pink — iPhone 17e will be available for pre-order beginning Wednesday, March 4, with availability starting Wednesday, March 11. iPhone 17e will start at 256GB of storage for $599 — 2x the entry storage from the previous generation at the same starting price, and 4x more than iPhone 12 — giving users more space for high-resolution photos, 4K videos, apps, games, and more.
“iPhone 17e combines powerful performance and features our users love at an exceptional value, making it a compelling option for customers looking to upgrade to the iPhone 17 family,” said Kaiann Drance, Apple’s vice president of Worldwide iPhone Product Marketing. “We know our customers want a product that will last, and iPhone 17e delivers just that. With A19 for incredible performance, double the entry storage, a smarter camera system, and enhanced durability, iPhone 17e is designed to stay fast, secure, and valuable for years to come.”
A Beautiful Design with Enhanced Durability
iPhone holds its value longer than other smartphones,3 and iPhone 17e is built to last. It features a strong yet lightweight aerospace-grade aluminum design, and is splash, water, and dust resistant with an IP68 rating.4 The Ceramic Shield 2 front cover — featured across the iPhone 17 family — is tougher than any smartphone glass, and an Apple-designed coating provides 3x better scratch resistance than the previous generation as well as improved anti-reflection to reduce glare.
The Super Retina XDR display with OLED technology delivers a fantastic viewing experience whether a user is streaming videos in Dolby Vision or playing games, and with up to 1200 nits peak HDR brightness, it is easy to view content on brighter days. Face ID provides a seamless and secure way to unlock iPhone 17e, authenticate purchases, sign in to apps, and more. With the Action button, users can access their favorite features — like the flashlight, visual intelligence, and more — with just a press.
Powerful Performance and Exceptional Efficiency
iPhone 17e features the latest-generation A19 built with advanced 3-nanometer technology, delivering powerful performance. The faster, more efficient 6-core CPU — up to 2x faster than iPhone 11 — handles everything from simple tasks like scrolling through photos to advanced Apple Intelligence capabilities like Clean Up. The 4-core GPU with Neural Accelerators unlocks console-level gaming on the go, supporting demanding AAA titles and hardware-accelerated ray tracing for more realistic lighting and reflections. The upgraded 16-core Neural Engine is optimized for large generative models and, combined with Neural Accelerators built into each GPU, enables Apple Intelligence and other AI models to run faster than on the previous generation.
iPhone 17e also features C1X, the latest-generation cellular modem designed by Apple. C1X is up to 2x faster than C1 in iPhone 16e and matches the speed of iPhone Air. C1X uses 30 percent less energy than the modem in iPhone 16 Pro, contributing to the exceptional all-day battery life.
Excellent Battery Life, Fast Charging, and MagSafe
iPhone 17e delivers exceptional all-day battery life, enabled by the efficiencies of Apple silicon, including the C1X cellular modem, and the advanced power management of iOS 26. With fast wired charging using USB-C, iPhone 17e can charge up to 50 percent in around 30 minutes.5 iPhone 17e also supports MagSafe and Qi2 for fast wireless charging up to 15W compared to 7.5W Qi wireless charging on iPhone 16e. MagSafe chargers, stands, cases, wallets, camera accessories, and more snap easily to the back of iPhone 17e, providing seamless alignment with a wide ecosystem of accessories.
An Advanced Camera System to Capture Everyday Moments
iPhone 17e takes gorgeous photos with excellent detail, including in low light with Night mode. The 48MP Fusion camera enables an optical-quality 2x Telephoto, giving users two cameras in one so they can get closer to the subject and easily frame their shot. Users can shoot sharp photos at up to 48MP resolution, or capture in the 24MP default for incredible image quality at a file size perfect for storing and sharing. Portrait mode improves thanks to an advanced image pipeline, delivering remarkably natural depth and smooth bokeh that gracefully blurs the background while keeping subjects sharp. The advanced pipeline also enables next-generation portraits, so iPhone 17e recognizes people, dogs, and cats, and automatically saves depth information, allowing users to turn photos into beautiful portraits with background blur after capture and to adjust the focus point in the Photos app. The latest generation of HDR captures subjects with true-to-life renderings of skin tones and ensures bright highlights, rich midtones, and deep shadows across the image — all while preserving fine details.
iPhone 17e takes stunning videos with the ability to record in 4K with Dolby Vision up to 60 fps. iPhone 17e also records video in Spatial Audio for immersive listening with AirPods or Apple Vision Pro, and enables more ways to edit video sound with Audio Mix. With wind noise reduction, powerful machine learning algorithms automatically reduce unwanted noise for better audio quality.
Groundbreaking Safety and Communication Capabilities
iPhone 17e helps users stay connected and get assistance when it matters most. When outside of cellular and Wi-Fi coverage, users can text friends and family with Messages via satellite; connect with emergency services using Emergency SOS via satellite; and reach roadside assistance providers with Roadside Assistance via satellite. The Find My app lets users share their location via satellite, reassuring friends and family of their whereabouts while traveling off the grid. Crash Detection can detect a severe car accident and automatically dial emergency services if a user is unconscious or unable to reach their iPhone.6
iOS 26 and Apple Intelligence
iPhone 17e comes with iOS 26, delivering a beautiful new design, powerful Apple Intelligence capabilities, and meaningful improvements to the apps users rely on every day.7 The new design with Liquid Glass makes apps and system experiences more expressive and delightful, bringing greater focus to content while keeping iOS instantly familiar and introducing even more ways to personalize iPhone. Apple Intelligence allows users to communicate across languages with Live Translation in Messages, FaceTime, Phone, and with AirPods.8 Visual intelligence now extends to a user’s iPhone screen, letting them search, ask questions, and take action on the content they’re viewing.9 To help users eliminate distractions, Call Screening can screen calls from unknown numbers and automatically ask the reason for calling, while Hold Assist can hold on the line until a live agent is available.10 In Messages, users can now choose to screen messages from unknown senders by filtering them to a dedicated folder so they don’t clutter up the conversation list.
iPhone 17e and the Environment
Apple 2030 is the company’s ambitious plan to be carbon neutral across its entire footprint by the end of this decade by reducing product emissions from their three biggest sources: materials, electricity, and transportation. iPhone 17e is made with 30 percent recycled content,11 including 85 percent recycled aluminum in the enclosure and 100 percent recycled cobalt in the battery. It is manufactured with 55 percent renewable electricity, like wind and solar, across the supply chain. iPhone 17e is designed to be durable, repairable, and also offers industry-leading software support, while meeting Apple’s high standards for energy efficiency and safe chemistry. The paper packaging is 100 percent fiber-based and can be easily recycled.12
Pricing and Availability
- iPhone 17e will be available in black, white, and soft pink in 256GB and 512GB storage capacities, starting at $599 (U.S.) or $24.95 (U.S.) per month for 24 months.13
- Apple offers great ways to save and upgrade to the latest iPhone. With a carrier offer, customers can get up to $400 (U.S.) in credit when they trade in iPhone 11, or up to $599 (U.S.) in credit when they trade in iPhone 13 to put toward an iPhone 17e. With Apple Trade In, customers can get up to $100 (U.S.) in credit when they trade in iPhone 11, or up to $195 (U.S.) in credit when they trade in iPhone 13. There are also great offers available for customers without a device to trade in. Customers can take advantage of these offers by visiting the Apple Store online or an Apple Store location. For carrier offer eligibility requirements and more details, see apple.com/shop/buy-iphone/carrier-offers. To see what their device is worth and for Apple Trade In terms and conditions, customers can visit apple.com/shop/trade-in.
- Customers in more than 70 countries and regions, including Australia, Canada, China, France, Germany, India, Japan, Malaysia, Mexico, South Korea, Türkiye, the UAE, the UK, and the U.S., will be able to pre-order iPhone 17e beginning at 6:15 a.m. PST this Wednesday, March 4, with availability beginning Wednesday, March 11.
- Apple Intelligence is available in beta with support for these languages: English, Danish, Dutch, French, German, Italian, Norwegian, Portuguese, Spanish, Swedish, Turkish, Vietnamese, Chinese (simplified), Chinese (traditional), Japanese, and Korean. Some features may not be available in all regions or languages. For feature and language availability and system requirements, see support.apple.com/en-us/121115.
- iPhone 17e Silicone Case with MagSafe will be available in six colors — black, anchor blue, light moss, vanilla, bright guava, and soft pink — for $49 (U.S.) and is compatible with the Crossbody Strap. iPhone 17e Clear Case with MagSafe will also be available for $49 (U.S.).
- AppleCare delivers exceptional service and support, with flexible options for Apple users. Customers can choose AppleCare+ to cover their new iPhone, or in the U.S., AppleCare One to protect multiple products in one simple plan. Both plans include coverage for accidents like drops and spills, theft and loss protection on eligible products, battery replacement service, and 24/7 support from Apple Experts. For more information, visit apple.com/applecare.
- iCloud+ plans start at just $0.99 (U.S.) per month, providing additional storage to keep photos, videos, files, and more safe in the cloud and accessible across devices. iCloud+ also gives access to premium features such as event creation in the Apple Invites app, as well as Private Relay, Hide My Email, Custom Email Domains, and HomeKit Secure Video. With Family Sharing, users can share their subscription with five other family members at no extra cost. For more information, visit apple.com/icloud.
- Customers who purchase iPhone 17e may receive three free months of Apple Arcade, Apple Fitness+, Apple Music, Apple News+, and Apple TV with a new subscription. Offer and services availability varies by region. See apple.com/promo for details.
About Apple Apple revolutionized personal technology with the introduction of the Macintosh in 1984. Today, Apple leads the world in innovation with iPhone, iPad, Mac, AirPods, Apple Watch, and Apple Vision Pro. Apple’s six software platforms — iOS, iPadOS, macOS, watchOS, visionOS, and tvOS — provide seamless experiences across all Apple devices and empower people with breakthrough services including the App Store, Apple Music, Apple Pay, iCloud, and Apple TV. Apple’s more than 150,000 employees are dedicated to making the best products on earth and to leaving the world better than we found it.
- The display has rounded corners that follow a beautiful curved design, and these corners are within a standard rectangle. When measured as a standard rectangular shape, the screen is 6.06 inches diagonally. The actual viewable area is smaller.
- Apple’s satellite features are included for free for two years starting at the time of activation of a new iPhone 14 or later, and are not available in all markets. For Emergency SOS via satellite availability, visit support.apple.com/en-us/HT213426. For Messages via satellite availability, visit support.apple.com/en-us/120930. For Roadside Assistance via satellite availability, visit support.apple.com/en-us/105098. Apple’s satellite features were designed for use in open spaces with a clear line of sight to the sky. Performance may be impacted by obstructions such as trees or surrounding buildings.
- Based on data from FDM | CCS Insight from 2023 to mid-2025, comparing average trade-in price of working-condition smartphones from major brands in key markets.
- iPhone 17e is splash-, water-, and dust-resistant. It was tested under controlled laboratory conditions and has a rating of IP68 under IEC standard 60529 (maximum depth of 6 meters for up to 30 minutes). Splash, water, and dust resistance are not permanent conditions. Resistance might decrease as a result of normal wear. Do not attempt to charge a wet iPhone; refer to the user guide for cleaning and drying instructions. Liquid damage is not covered under warranty.
- A 20W or higher power adapter is required to fast-charge iPhone 17e.
- Crash Detection is designed for four-wheel passenger vehicle crashes with certain mass, G-force, and speed profiles consistent with severe, life-threatening crashes. It was designed for severe, life-threatening, high-impact front and rear, side-swipe, T-bone, and rollover crashes. Crash Detection is available worldwide on iPhone 14 or later, Apple Watch Series 8 or later, Apple Watch SE, and Apple Watch Ultra or later.
- Features are subject to change. Some features, applications, and services may not be available in all regions or all languages. For more information on iOS 26, visit apple.com/os/ios.
- Live Translation in Messages supports English (U.S., UK), Dutch, French (France), German, Italian, Japanese, Korean, Portuguese (Brazil), Spanish (Spain), Chinese (simplified), Chinese (traditional), Turkish, and Vietnamese. Live Translation in Phone, FaceTime, and with AirPods supports English (U.S., UK), French (France), German, Italian, Japanese, Korean, Portuguese (Brazil), Spanish (Spain), Chinese (Mandarin, simplified), and Chinese (Mandarin, traditional). Live Translation with AirPods works on AirPods 4 with Active Noise Cancellation or AirPods Pro 2 and later with the latest firmware when paired with an Apple Intelligence-enabled iPhone.
- Visual intelligence is available on any Apple Intelligence-enabled iPhone. Some capabilities may not be available in all languages and regions. For more details, see support.apple.com/en-us/121115#visual-intelligence.
- Call Screening supports Cantonese (China mainland, Hong Kong, Macao), English (U.S., Australia, Canada, India, Ireland, New Zealand, Puerto Rico, Singapore, South Africa, UK), French (Canada, France), German (Germany), Japanese (Japan), Korean (Korea), Mandarin Chinese (China mainland, Taiwan, Macao), Portuguese (Brazil), and Spanish (U.S., Mexico, Puerto Rico, Spain). Hold Assist supports English (U.S., Australia, Canada, India, Singapore, UK), French (France), Spanish (U.S., Mexico, Spain), German (Germany), Portuguese (Brazil), Japanese (Japan), and Mandarin Chinese (China mainland).
- Product recycled or renewable content is the mass of certified recycled material relative to the overall mass of the device, not including packaging or in-box accessories.
- Breakdown of U.S. retail packaging by weight. Adhesives, inks, and coatings are excluded from Apple’s calculations.
- Customers in the U.S. who shop at Apple using Apple Card can pay monthly at 0 percent APR when they choose to check out with Apple Card Monthly Installments, and they’ll get 3 percent Daily Cash back — all up front. More information — including details on eligibility, exclusions, and Apple Card terms — is available at apple.com/apple-card/monthly-installments.
Media
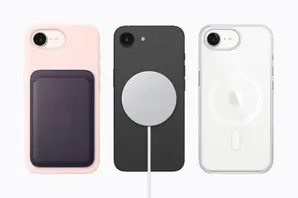
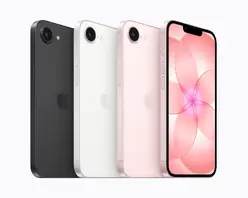


Press Contacts
Blair Ranger - Apple
blair_ranger@apple.comStephanie Ng - Apple
sng26@apple.comApple Media Helpline
media.help@apple.com -
- iOS 26.3 (Build 23K620) for:
- iOS 18.7.5 (Build 22H311) for:
- iOS 26.3 (Build 23D127) for:
- iPad Pro 3 (11'', Wi-Fi) (iPad8,1) — Download
- iPad Pro 3 (11'', Wi-Fi, 1 TB) (iPad8,2) — Download
- iPad Pro 3 (11'', Cellular) (iPad8,3) — Download
- iPad Pro 3 (11'', Cellular, 1 TB) (iPad8,4) — Download
- iPad Pro 3 (12.9'', Wi-Fi) (iPad8,5) — Download
- iPad Pro 3 (12.9'', Wi-Fi, 1 TB) (iPad8,6) — Download
- iPad Pro 3 (12.9'', Cellular) (iPad8,7) — Download
- iPad Pro 3 (12.9'', Cellular, 1 TB) (iPad8,8) — Download
- iPad8,9 (iPad8,9) — Download
- iPad8,10 (iPad8,10) — Download
- iPad8,11 (iPad8,11) — Download
- iPad8,12 (iPad8,12) — Download
- iPad mini 5 (Wi-Fi) (iPad11,1) — Download
- iPad mini 5 (Cellular) (iPad11,2) — Download
- iPad Air 3 (Wi-Fi) (iPad11,3) — Download
- iPad Air 3 (Cellular) (iPad11,4) — Download
- iPad11,6 (iPad11,6) — Download
- iPad11,7 (iPad11,7) — Download
- iPad12,1 (iPad12,1) — Download
- iPad12,2 (iPad12,2) — Download
- iPad13,1 (iPad13,1) — Download
- iPad13,2 (iPad13,2) — Download
- iPad13,4 (iPad13,4) — Download
- iPad13,5 (iPad13,5) — Download
- iPad13,6 (iPad13,6) — Download
- iPad13,7 (iPad13,7) — Download
- iPad13,8 (iPad13,8) — Download
- iPad13,9 (iPad13,9) — Download
- iPad13,10 (iPad13,10) — Download
- iPad13,11 (iPad13,11) — Download
- iPad13,16 (iPad13,16) — Download
- iPad13,17 (iPad13,17) — Download
- iPad13,18 (iPad13,18) — Download
- iPad13,19 (iPad13,19) — Download
- iPad14,1 (iPad14,1) — Download
- iPad14,2 (iPad14,2) — Download
- iPad14,3 (iPad14,3) — Download
- iPad14,4 (iPad14,4) — Download
- iPad14,5 (iPad14,5) — Download
- iPad14,6 (iPad14,6) — Download
- iPad14,8 (iPad14,8) — Download
- iPad14,9 (iPad14,9) — Download
- iPad14,10 (iPad14,10) — Download
- iPad14,11 (iPad14,11) — Download
- iPad16,1 (iPad16,1) — Download
- iPad16,2 (iPad16,2) — Download
- iPad16,3 (iPad16,3) — Download
- iPad16,4 (iPad16,4) — Download
- iPad16,5 (iPad16,5) — Download
- iPad16,6 (iPad16,6) — Download
- iPhone 11 (iPhone12,1) — Download
- iPhone 11 Pro (iPhone12,3) — Download
- iPhone 11 Pro Max (iPhone12,5) — Download
- iPhone12,8 (iPhone12,8) — Download
- iPhone13,1 (iPhone13,1) — Download
- iPhone13,2 (iPhone13,2) — Download
- iPhone13,3 (iPhone13,3) — Download
- iPhone13,4 (iPhone13,4) — Download
- iPhone14,2 (iPhone14,2) — Download
- iPhone14,3 (iPhone14,3) — Download
- iPhone14,4 (iPhone14,4) — Download
- iPhone14,5 (iPhone14,5) — Download
- iPhone14,6 (iPhone14,6) — Download
- iPhone14,7 (iPhone14,7) — Download
- iPhone14,8 (iPhone14,8) — Download
- iPhone15,2 (iPhone15,2) — Download
- iPhone15,3 (iPhone15,3) — Download
- iPhone15,4 (iPhone15,4) — Download
- iPhone15,5 (iPhone15,5) — Download
- iPhone16,1 (iPhone16,1) — Download
- iPhone16,2 (iPhone16,2) — Download
- iPhone17,1 (iPhone17,1) — Download
- iPhone17,2 (iPhone17,2) — Download
- iPhone17,3 (iPhone17,3) — Download
- iPhone17,4 (iPhone17,4) — Download
- iPhone17,5 (iPhone17,5) — Download
- iPad15,7 (iPad15,7) — Download
- iPad15,8 (iPad15,8) — Download
- iPad15,5 (iPad15,5) — Download
- iPad15,3 (iPad15,3) — Download
- iPad15,4 (iPad15,4) — Download
- iPad15,6 (iPad15,6) — Download
- iPhone18,2 (iPhone18,2) — Download
- iPhone18,4 (iPhone18,4) — Download
- iPhone18,1 (iPhone18,1) — Download
- iPhone18,3 (iPhone18,3) — Download
- iPad17,2 (iPad17,2) — Download
- iPad17,1 (iPad17,1) — Download
- iPad17,3 (iPad17,3) — Download
- iPad17,4 (iPad17,4) — Download
-
- iOS 9.9.26.3 (beta) (Build 23D6127) for:
- iPad mini 5 (Wi-Fi) (iPad11,1)
- iPad mini 5 (Cellular) (iPad11,2)
- iPad Air 3 (Wi-Fi) (iPad11,3)
- iPad Air 3 (Cellular) (iPad11,4)
- iPad11,6 (iPad11,6)
- iPad11,7 (iPad11,7)
- iPad12,1 (iPad12,1)
- iPad12,2 (iPad12,2)
- iPad13,1 (iPad13,1)
- iPad13,10 (iPad13,10)
- iPad13,11 (iPad13,11)
- iPad13,16 (iPad13,16)
- iPad13,17 (iPad13,17)
- iPad13,18 (iPad13,18)
- iPad13,19 (iPad13,19)
- iPad13,2 (iPad13,2)
- iPad13,4 (iPad13,4)
- iPad13,5 (iPad13,5)
- iPad13,6 (iPad13,6)
- iPad13,7 (iPad13,7)
- iPad13,8 (iPad13,8)
- iPad13,9 (iPad13,9)
- iPad14,1 (iPad14,1)
- iPad14,2 (iPad14,2)
- iPad14,3 (iPad14,3)
- iPad14,4 (iPad14,4)
- iPad14,5 (iPad14,5)
- iPad14,6 (iPad14,6)
- iPad Pro 3 (11'', Wi-Fi) (iPad8,1)
- iPad8,10 (iPad8,10)
- iPad8,11 (iPad8,11)
- iPad8,12 (iPad8,12)
- iPad Pro 3 (11'', Wi-Fi, 1 TB) (iPad8,2)
- iPad Pro 3 (11'', Cellular) (iPad8,3)
- iPad Pro 3 (11'', Cellular, 1 TB) (iPad8,4)
- iPad Pro 3 (12.9'', Wi-Fi) (iPad8,5)
- iPad Pro 3 (12.9'', Wi-Fi, 1 TB) (iPad8,6)
- iPad Pro 3 (12.9'', Cellular) (iPad8,7)
- iPad Pro 3 (12.9'', Cellular, 1 TB) (iPad8,8)
- iPad8,9 (iPad8,9)
- iPhone 11 (iPhone12,1)
- iPhone 11 Pro (iPhone12,3)
- iPhone 11 Pro Max (iPhone12,5)
- iPhone12,8 (iPhone12,8)
- iPhone13,1 (iPhone13,1)
- iPhone13,2 (iPhone13,2)
- iPhone13,3 (iPhone13,3)
- iPhone13,4 (iPhone13,4)
- iPhone14,2 (iPhone14,2)
- iPhone14,3 (iPhone14,3)
- iPhone14,4 (iPhone14,4)
- iPhone14,5 (iPhone14,5)
- iPhone14,6 (iPhone14,6)
- iPhone14,7 (iPhone14,7)
- iPhone14,8 (iPhone14,8)
- iPhone15,2 (iPhone15,2)
- iPhone15,3 (iPhone15,3)
- iOS 9.9.18.7.5 (beta) (Build 22H6311) for:
- iPad 7 (Wi-Fi) (iPad7,11)
- iPad 7 (Cellular) (iPad7,12)
- iPhone XS (iPhone11,2)
- iPhone XS Max (China) (iPhone11,6)
- iPhone XR (iPhone11,8)
- iOS 9.9.26.3 (Build 23D127) for:
- iPad mini 5 (Wi-Fi) (iPad11,1)
- iPad mini 5 (Cellular) (iPad11,2)
- iPad Air 3 (Wi-Fi) (iPad11,3)
- iPad Air 3 (Cellular) (iPad11,4)
- iPad11,6 (iPad11,6)
- iPad11,7 (iPad11,7)
- iPad12,1 (iPad12,1)
- iPad12,2 (iPad12,2)
- iPad13,1 (iPad13,1)
- iPad13,10 (iPad13,10)
- iPad13,11 (iPad13,11)
- iPad13,16 (iPad13,16)
- iPad13,17 (iPad13,17)
- iPad13,18 (iPad13,18)
- iPad13,19 (iPad13,19)
- iPad13,2 (iPad13,2)
- iPad13,4 (iPad13,4)
- iPad13,5 (iPad13,5)
- iPad13,6 (iPad13,6)
- iPad13,7 (iPad13,7)
- iPad13,8 (iPad13,8)
- iPad13,9 (iPad13,9)
- iPad14,1 (iPad14,1)
- iPad14,2 (iPad14,2)
- iPad14,3 (iPad14,3)
- iPad14,4 (iPad14,4)
- iPad14,5 (iPad14,5)
- iPad14,6 (iPad14,6)
- iPad Pro 3 (11'', Wi-Fi) (iPad8,1)
- iPad8,10 (iPad8,10)
- iPad8,11 (iPad8,11)
- iPad8,12 (iPad8,12)
- iPad Pro 3 (11'', Wi-Fi, 1 TB) (iPad8,2)
- iPad Pro 3 (11'', Cellular) (iPad8,3)
- iPad Pro 3 (11'', Cellular, 1 TB) (iPad8,4)
- iPad Pro 3 (12.9'', Wi-Fi) (iPad8,5)
- iPad Pro 3 (12.9'', Wi-Fi, 1 TB) (iPad8,6)
- iPad Pro 3 (12.9'', Cellular) (iPad8,7)
- iPad Pro 3 (12.9'', Cellular, 1 TB) (iPad8,8)
- iPad8,9 (iPad8,9)
- iPhone 11 (iPhone12,1)
- iPhone 11 Pro (iPhone12,3)
- iPhone 11 Pro Max (iPhone12,5)
- iPhone12,8 (iPhone12,8)
- iPhone13,1 (iPhone13,1)
- iPhone13,2 (iPhone13,2)
- iPhone13,3 (iPhone13,3)
- iPhone13,4 (iPhone13,4)
- iPhone14,2 (iPhone14,2)
- iPhone14,3 (iPhone14,3)
- iPhone14,4 (iPhone14,4)
- iPhone14,5 (iPhone14,5)
- iPhone14,6 (iPhone14,6)
- iPhone14,7 (iPhone14,7)
- iPhone14,8 (iPhone14,8)
- iPhone15,2 (iPhone15,2)
- iPhone15,3 (iPhone15,3)
- iOS 9.9.18.7.5 (Build 22H311) for:
- iPad 7 (Wi-Fi) (iPad7,11)
- iPad 7 (Cellular) (iPad7,12)
- iPhone XS (iPhone11,2)
- iPhone XS Max (China) (iPhone11,6)
- iPhone XR (iPhone11,8)
- iOS 9.9.26.3 (beta) (Build 23D6127) for:
-
iOS 16.7.14 (Build 20H370) for:
- iPad Pro (9.7'', Wi-Fi) (iPad6,3) — Download
- iPad Pro (9.7'', Cellular) (iPad6,4) — Download
- iPad Pro (Wi-Fi) (iPad6,7) — Download
- iPad Pro (Cellular) (iPad6,8) — Download
- iPad 5 (Wi-Fi) (iPad6,11) — Download
- iPad 5 (Cellular) (iPad6,12) — Download
- iPhone 8 (CDMA/GSM/LTE) (iPhone10,1) — Download
- iPhone 8 Plus (CDMA/GSM/LTE) (iPhone10,2) — Download
- iPhone X (CDMA/GSM/LTE) (iPhone10,3) — Download
- iPhone 8 (GSM/LTE) (iPhone10,4) — Download
- iPhone 8 Plus (GSM/LTE) (iPhone10,5) — Download
- iPhone X (GSM/LTE) (iPhone10,6) — Download
-
- iOS 9.9.16.7.14 (beta) (Build 20H6370) for:
- iPad 5 (Wi-Fi) (iPad6,11)
- iPad 5 (Cellular) (iPad6,12)
- iPad Pro (9.7'', Wi-Fi) (iPad6,3)
- iPad Pro (9.7'', Cellular) (iPad6,4)
- iPad Pro (Wi-Fi) (iPad6,7)
- iPad Pro (Cellular) (iPad6,8)
- iPhone 8 (CDMA/GSM/LTE) (iPhone10,1)
- iPhone 8 Plus (CDMA/GSM/LTE) (iPhone10,2)
- iPhone X (CDMA/GSM/LTE) (iPhone10,3)
- iPhone 8 (GSM/LTE) (iPhone10,4)
- iPhone 8 Plus (GSM/LTE) (iPhone10,5)
- iPhone X (GSM/LTE) (iPhone10,6)
- iOS 9.9.16.7.14 (Build 20H370) for:
- iPad 5 (Wi-Fi) (iPad6,11)
- iPad 5 (Cellular) (iPad6,12)
- iPad Pro (9.7'', Wi-Fi) (iPad6,3)
- iPad Pro (9.7'', Cellular) (iPad6,4)
- iPad Pro (Wi-Fi) (iPad6,7)
- iPad Pro (Cellular) (iPad6,8)
- iPhone 8 (CDMA/GSM/LTE) (iPhone10,1)
- iPhone 8 Plus (CDMA/GSM/LTE) (iPhone10,2)
- iPhone X (CDMA/GSM/LTE) (iPhone10,3)
- iPhone 8 (GSM/LTE) (iPhone10,4)
- iPhone 8 Plus (GSM/LTE) (iPhone10,5)
- iPhone X (GSM/LTE) (iPhone10,6)
- iOS 9.9.16.7.14 (beta) (Build 20H6370) for:
-
- iOS 6.3.1 (Build 17U224) for:
- Apple Watch Series 2 (38mm) (Watch2,3)
- Apple Watch Series 2 (42mm) (Watch2,4)
- Apple Watch Series 1 (38mm) (Watch2,6)
- Apple Watch Series 1 (42mm) (Watch2,7)
- Apple Watch Series 3 (38mm, LTE) (Watch3,1)
- Apple Watch Series 3 (42mm, LTE) (Watch3,2)
- Apple Watch Series 3 (38mm) (Watch3,3)
- Apple Watch Series 3 (42mm) (Watch3,4)
- Apple Watch Series 4 (40mm) (Watch4,1)
- Apple Watch Series 4 (44mm) (Watch4,2)
- Apple Watch Series 4 (40mm, LTE) (Watch4,3)
- Apple Watch Series 4 (44mm, LTE) (Watch4,4)
- Apple Watch Series 5 (40mm) (Watch5,1)
- Apple Watch Series 5 (44mm) (Watch5,2)
- Apple Watch Series 5 (40mm, LTE) (Watch5,3)
- Apple Watch Series 5 (44mm, LTE) (Watch5,4)
- iOS 6.3.1 (Build 17U6224) for:
- Apple Watch Series 2 (38mm) (Watch2,3)
- Apple Watch Series 2 (42mm) (Watch2,4)
- Apple Watch Series 1 (38mm) (Watch2,6)
- Apple Watch Series 1 (42mm) (Watch2,7)
- iOS 6.3.1 (Build 17U224) for:
-
-
-
-
-
Code
Display MoreWindows Registry Editor Version 5.00 [HKEY_CLASSES_ROOT\CLSID\{77708248-f839-436b-8919-527c410f48b9}] @="Registry Editor" "InfoTip"="Startet den Registry-Editor" "System.ControlPanel.Category"="5" [HKEY_CLASSES_ROOT\CLSID\{77708248-f839-436b-8919-527c410f48b9}\DefaultIcon] @="%SYSTEMROOT%\\regedit.exe" [HKEY_CLASSES_ROOT\CLSID\{77708248-f839-436b-8919-527c410f48b9}\Shell] [HKEY_CLASSES_ROOT\CLSID\{77708248-f839-436b-8919-527c410f48b9}\Shell\Open] [HKEY_CLASSES_ROOT\CLSID\{77708248-f839-436b-8919-527c410f48b9}\Shell\Open\Command] @=hex(2):25,00,53,00,79,00,73,00,74,00,65,00,6d,00,52,00,6f,00,6f,00,74,00,25,\ 00,5c,00,72,00,65,00,67,00,65,00,64,00,69,00,74,00,2e,00,65,00,78,00,65,00,\ 00,00 [HKEY_LOCAL_MACHINE\SOFTWARE\Microsoft\Windows\CurrentVersion\Explorer\ControlPanel\NameSpace\{77708248-f839-436b-8919-527c410f48b9}] @="Fügt den Registry-Editor der Systemsteuerung hinzu"The text is in German and can obviously adapted to your needs.
-
-
-
-
Code
Display MoreWindows Registry Editor Version 5.00 [HKEY_CLASSES_ROOT\.bat\ShellNew] "NullFile"="" "ItemName"=hex(2):40,00,25,00,53,00,79,00,73,00,74,00,65,00,6d,00,52,00,6f,00,\ 6f,00,74,00,25,00,5c,00,53,00,79,00,73,00,74,00,65,00,6d,00,33,00,32,00,5c,\ 00,61,00,63,00,70,00,70,00,61,00,67,00,65,00,2e,00,64,00,6c,00,6c,00,2c,00,\ 2d,00,36,00,30,00,30,00,32,00,00,00 [HKEY_CLASSES_ROOT\.cmd\ShellNew] "NullFile"="" "ItemName"=hex(2):40,00,43,00,3a,00,5c,00,57,00,69,00,6e,00,64,00,6f,00,77,00,\ 73,00,5c,00,53,00,79,00,73,00,74,00,65,00,6d,00,33,00,32,00,5c,00,61,00,63,\ 00,70,00,70,00,61,00,67,00,65,00,2e,00,64,00,6c,00,6c,00,2c,00,2d,00,36,00,\ 30,00,30,00,33,00,00,00 [HKEY_CLASSES_ROOT\.reg\ShellNew] "NullFile"="" "ItemName"=hex(2):40,00,43,00,3a,00,5c,00,57,00,69,00,6e,00,64,00,6f,00,77,00,\ 73,00,5c,00,72,00,65,00,67,00,65,00,64,00,69,00,74,00,2e,00,65,00,78,00,65,\ 00,2c,00,2d,00,33,00,30,00,39,00,00,00